Upload Cartridges
- Extract the zipfile.
- Upload cartridges (
bm_brightcove,int_brightcoveandapp_brightcove) to the Salesforce Commerce Cloud instance. - Activate the code version with the uploaded cartridges.
Configure Business Manager
- Login to Business Manager.
- Navigate to Administration -> Manage Sites
- Select the site from the list.
- Select Settings tab.
-
Add
app_brightcovein the cartridge path for the SFRA site as shown below: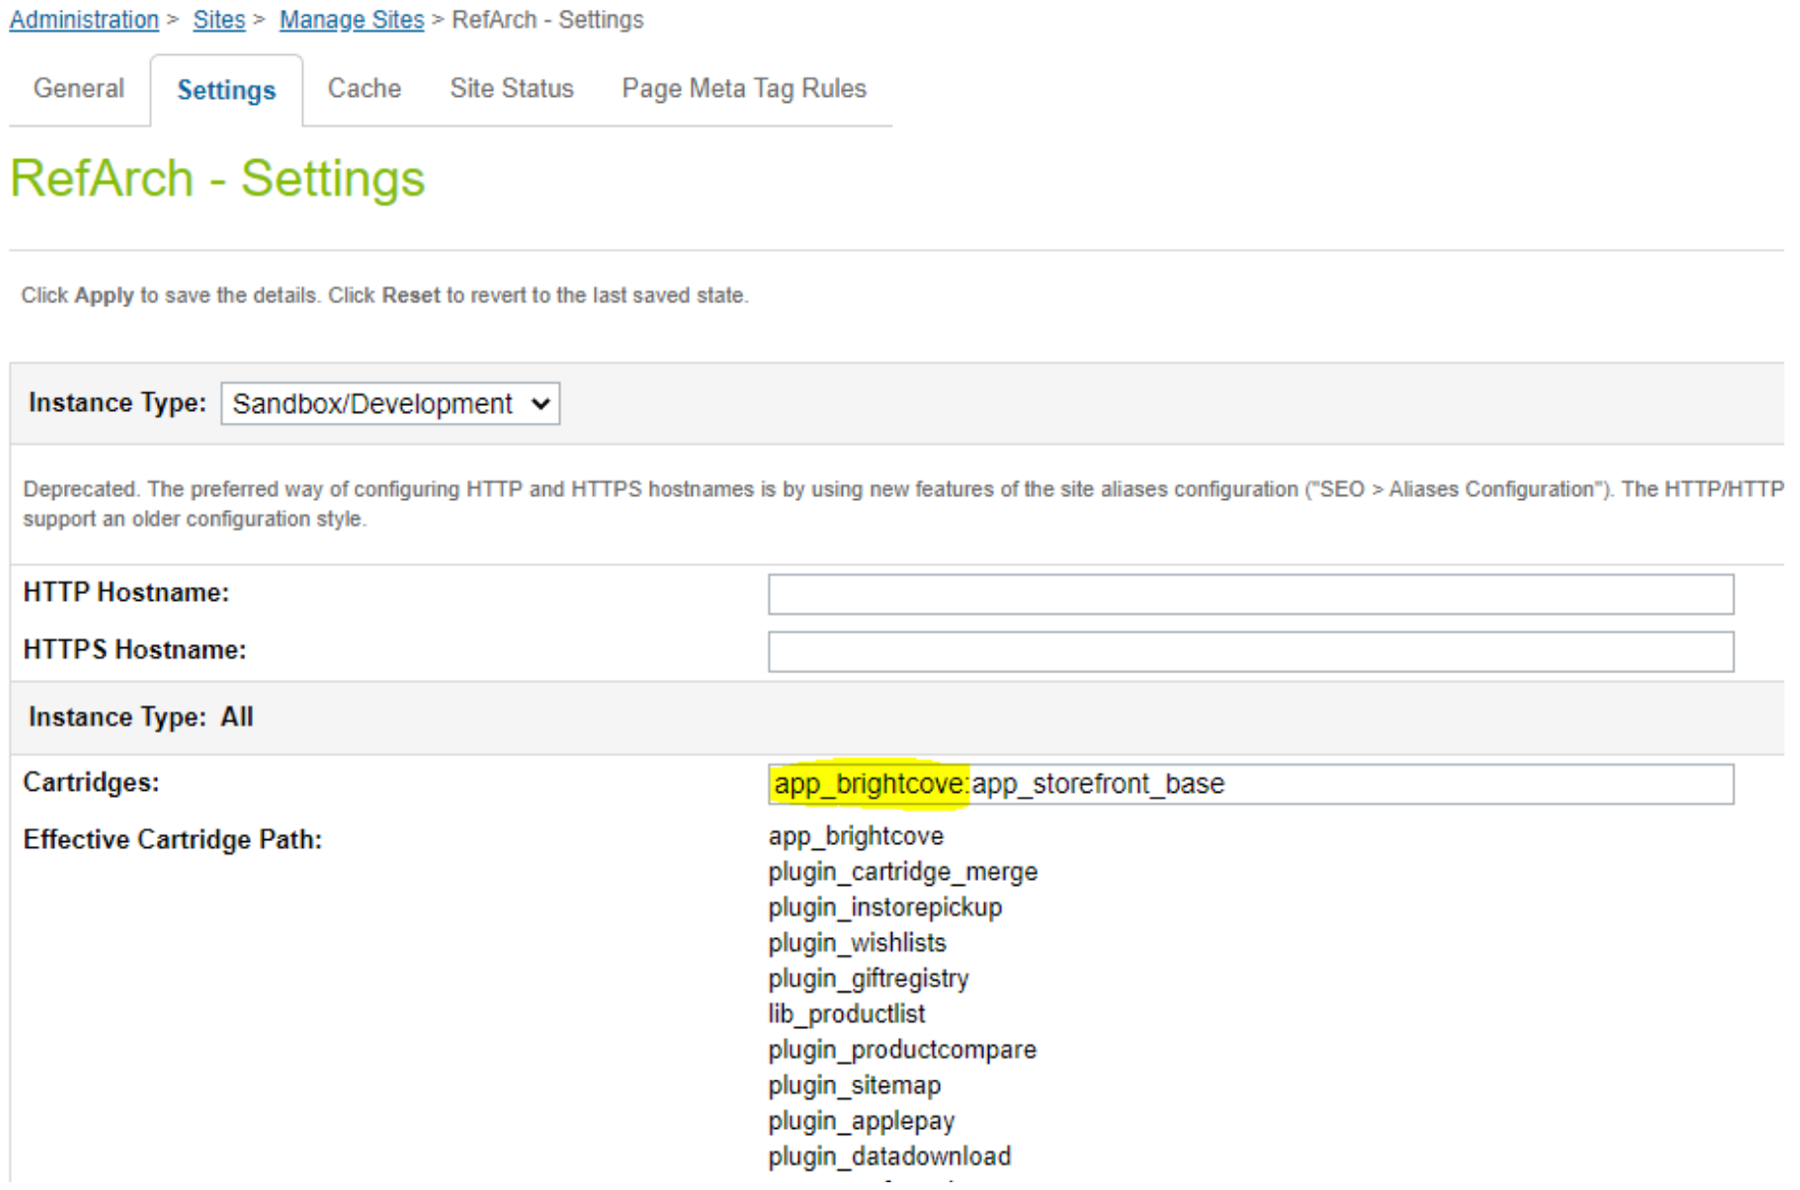
Add app_brightcove in Path - Apply the changes.
-
Add
int_brightcovein the cartridge path for the SiteGenesis architecture site as shown below: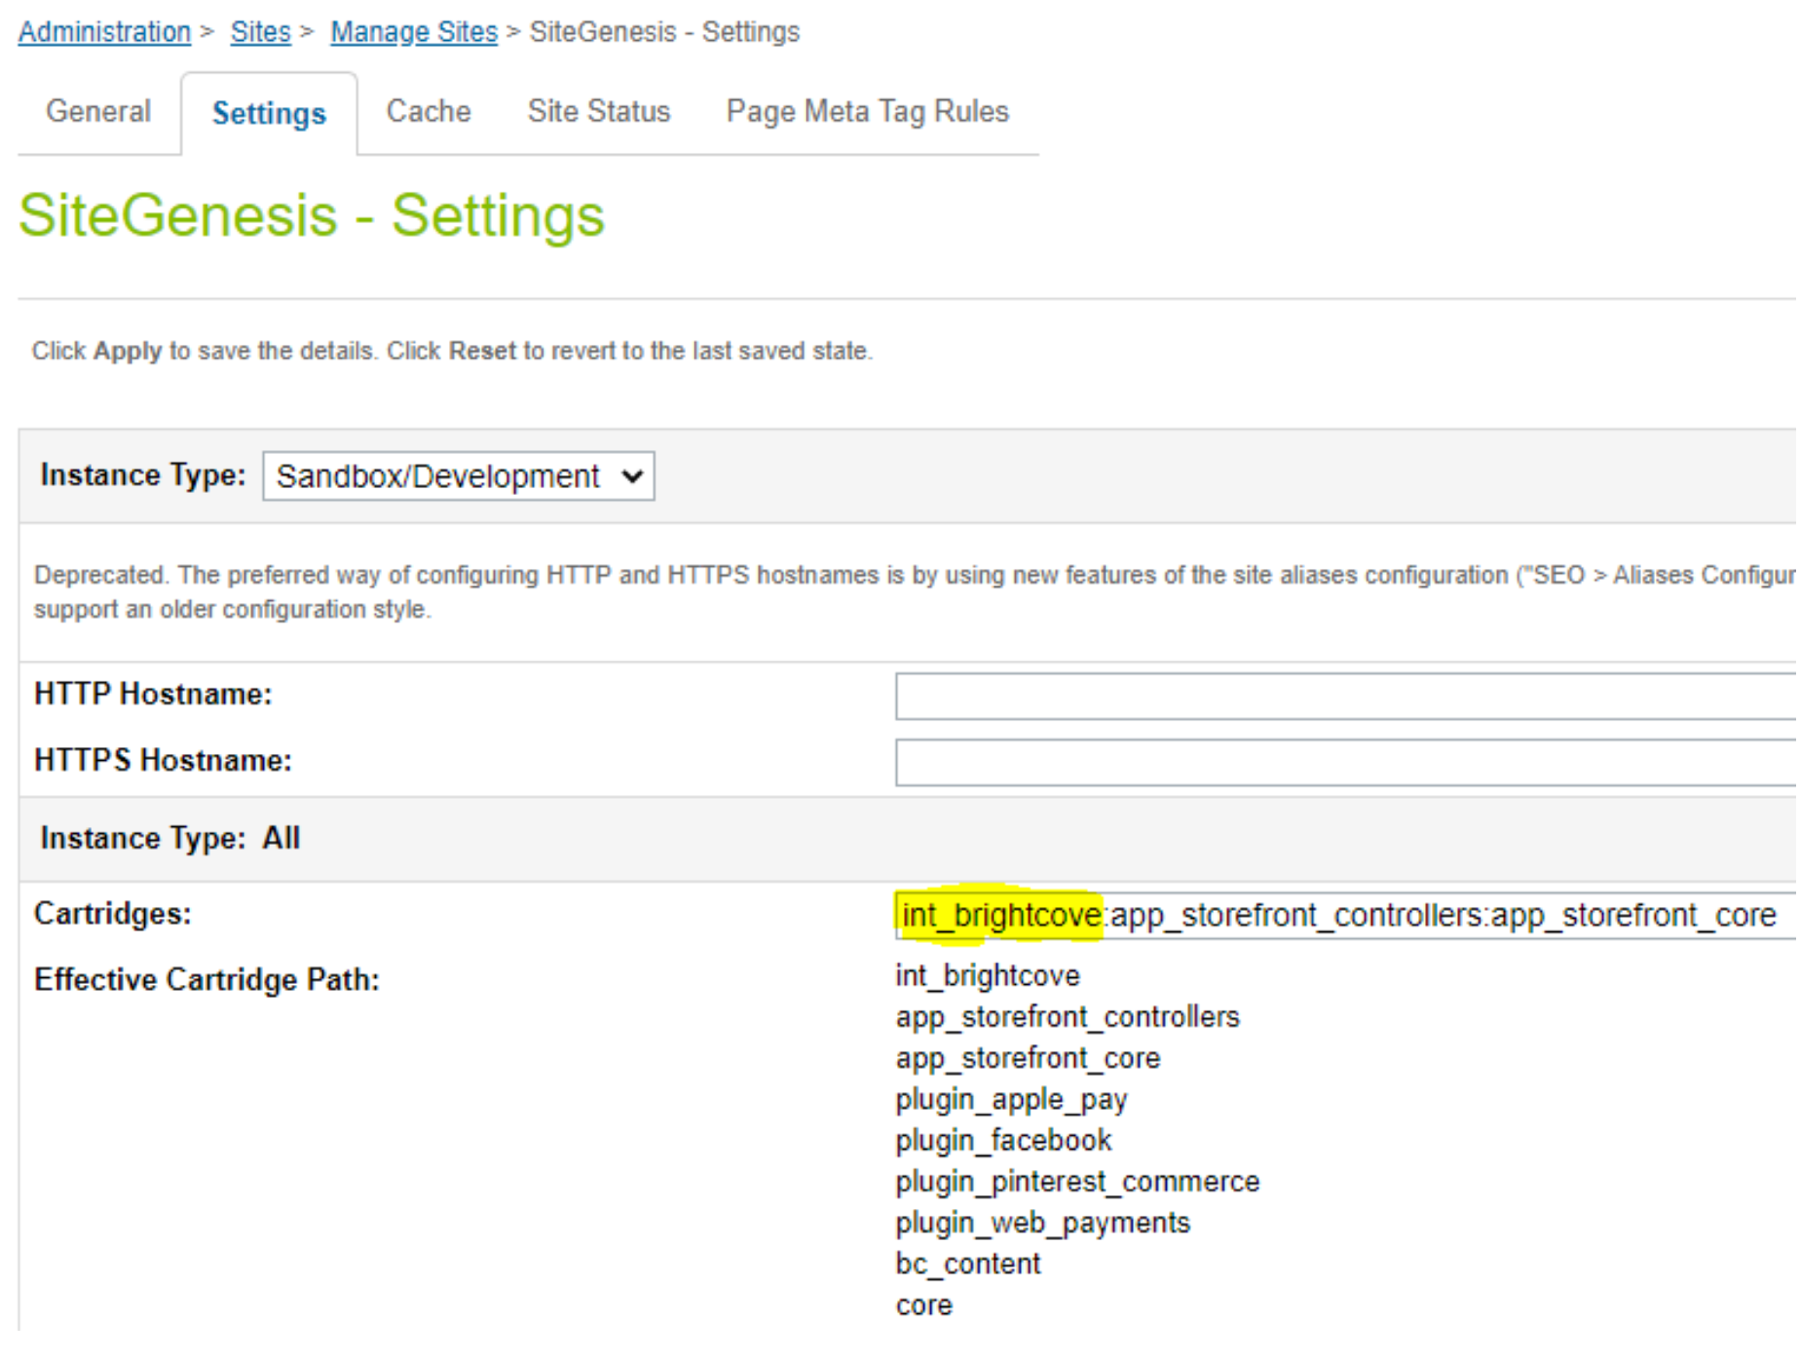
Add int_brightcove in Path - Apply the changes.
- Navigate to Administration -> Manage Sites
-
Select Business Manager:
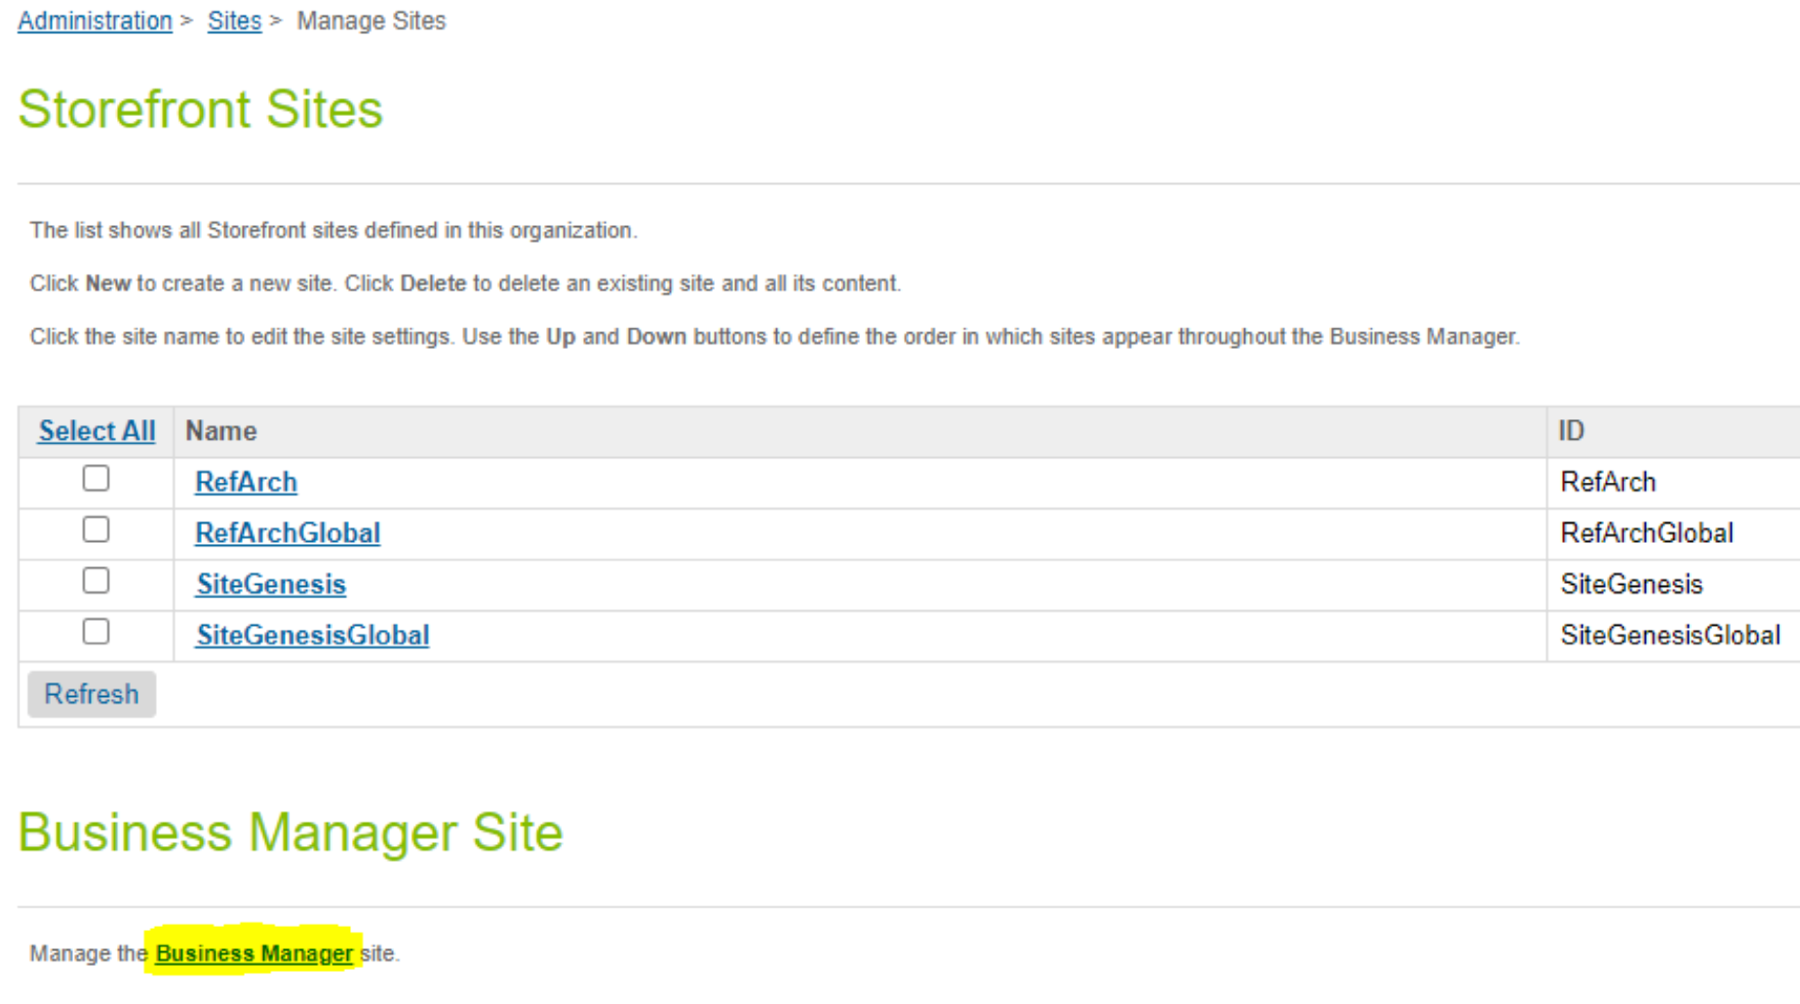
Select Business Manager -
Add
bm_brightcovein the cartridge path for the Business Manager: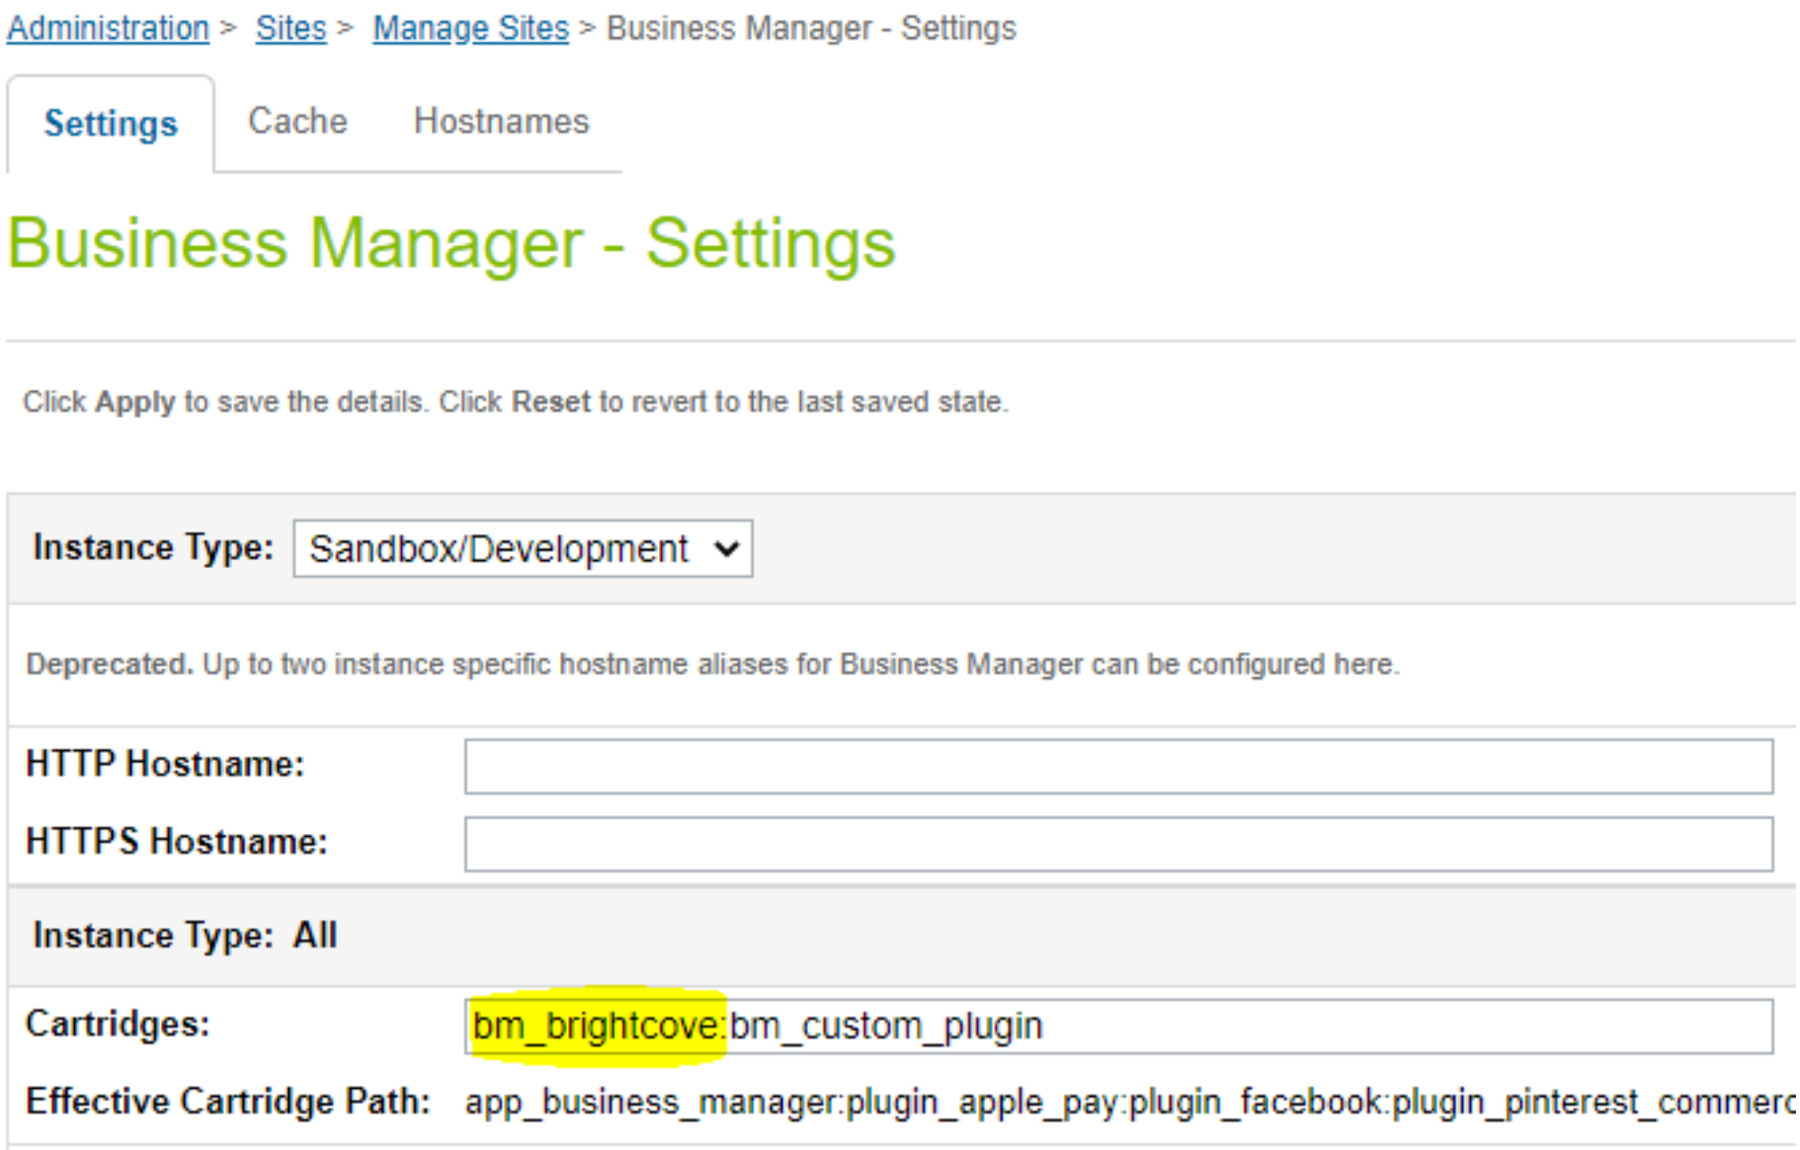
Add bm_brightcove in Path - Apply the changes.
Import System Object Extensions Files
- Navigate to Administration -> Site Development -> Import & Export.
-
Select Upload under Import & Export Files:
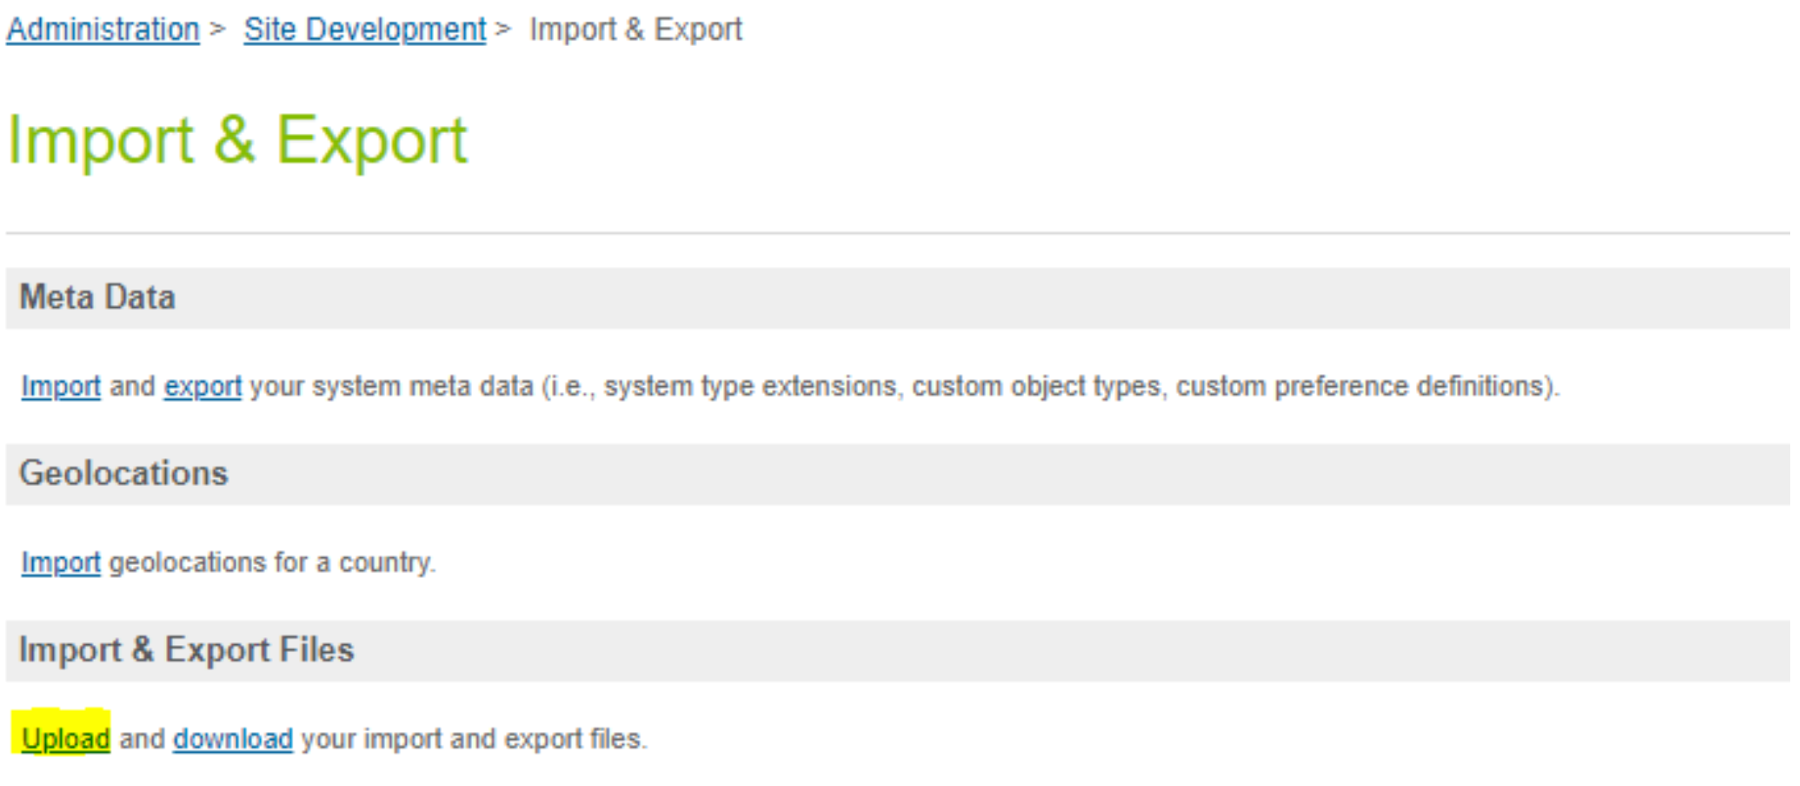
Select Upload - Upload
brightcove-objecttype-extensions.xmlfrom the meta directory of the zip file. - Navigate to Administration -> Site Development -> Import & Export.
-
Select the Import option under Meta Data:
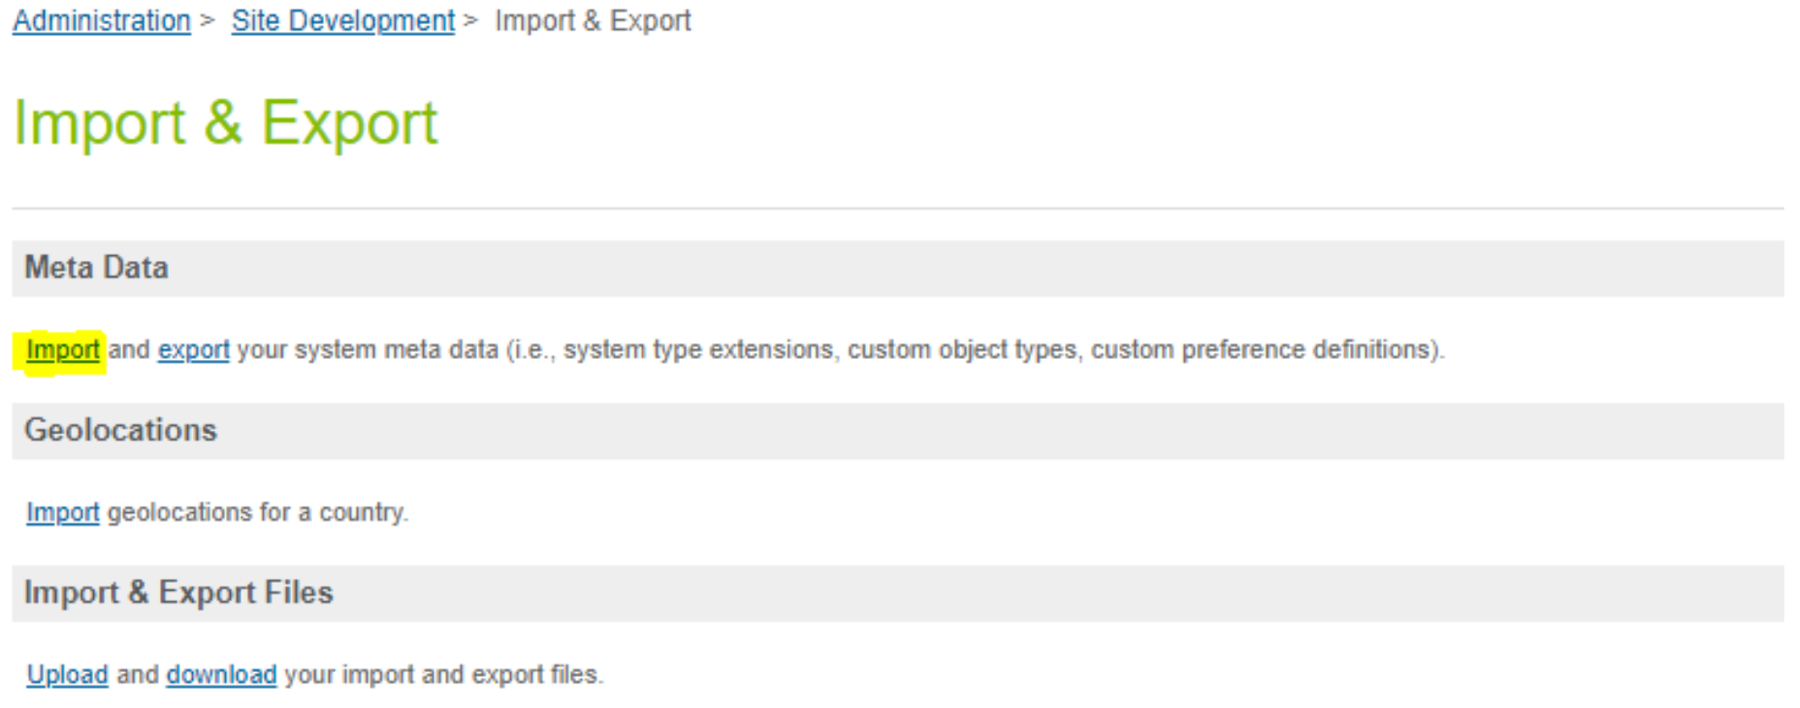
Select Import - Import the brightcove-objecttype-extensions.xml file.
Import Service Files
- Navigate to Administration -> Operations -> Import & Export
-
Select Upload under Import & Export Files:

Select Upload - Upload brightcove-services.xml from the meta directory of the zip file.
- Navigate to Administration -> Operations -> Import & Export.
-
Select the Import option under Services:
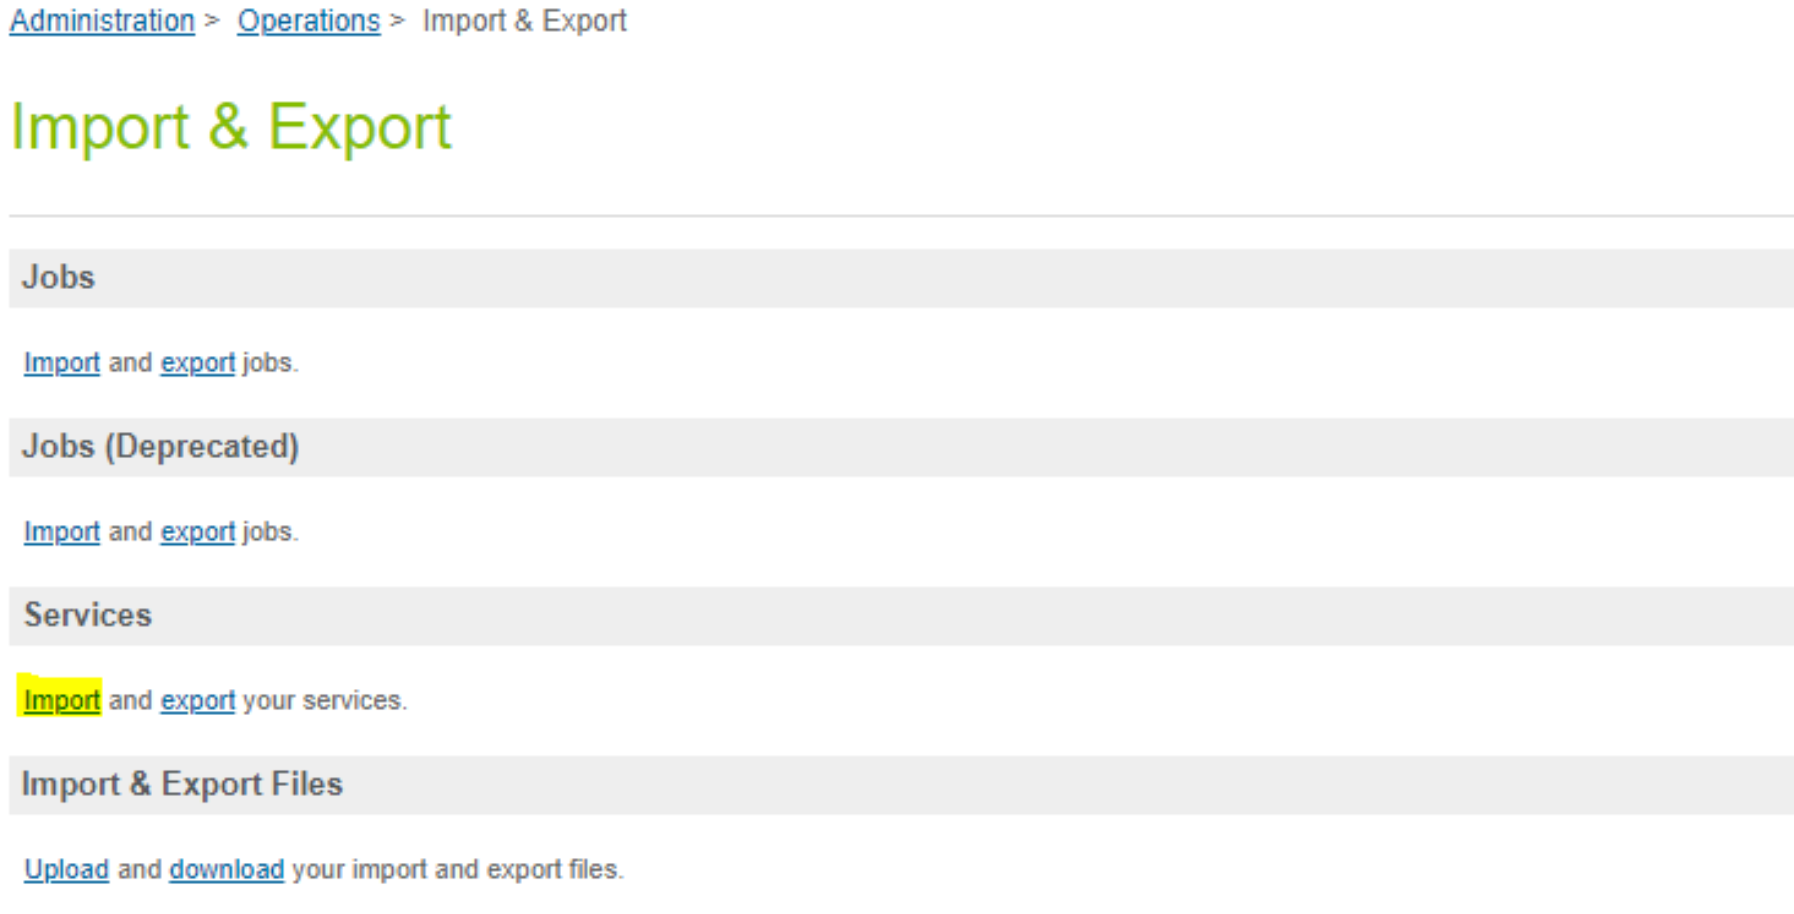
Select Import - Import the
brightcove-services.xmlfile.
Import Job Files
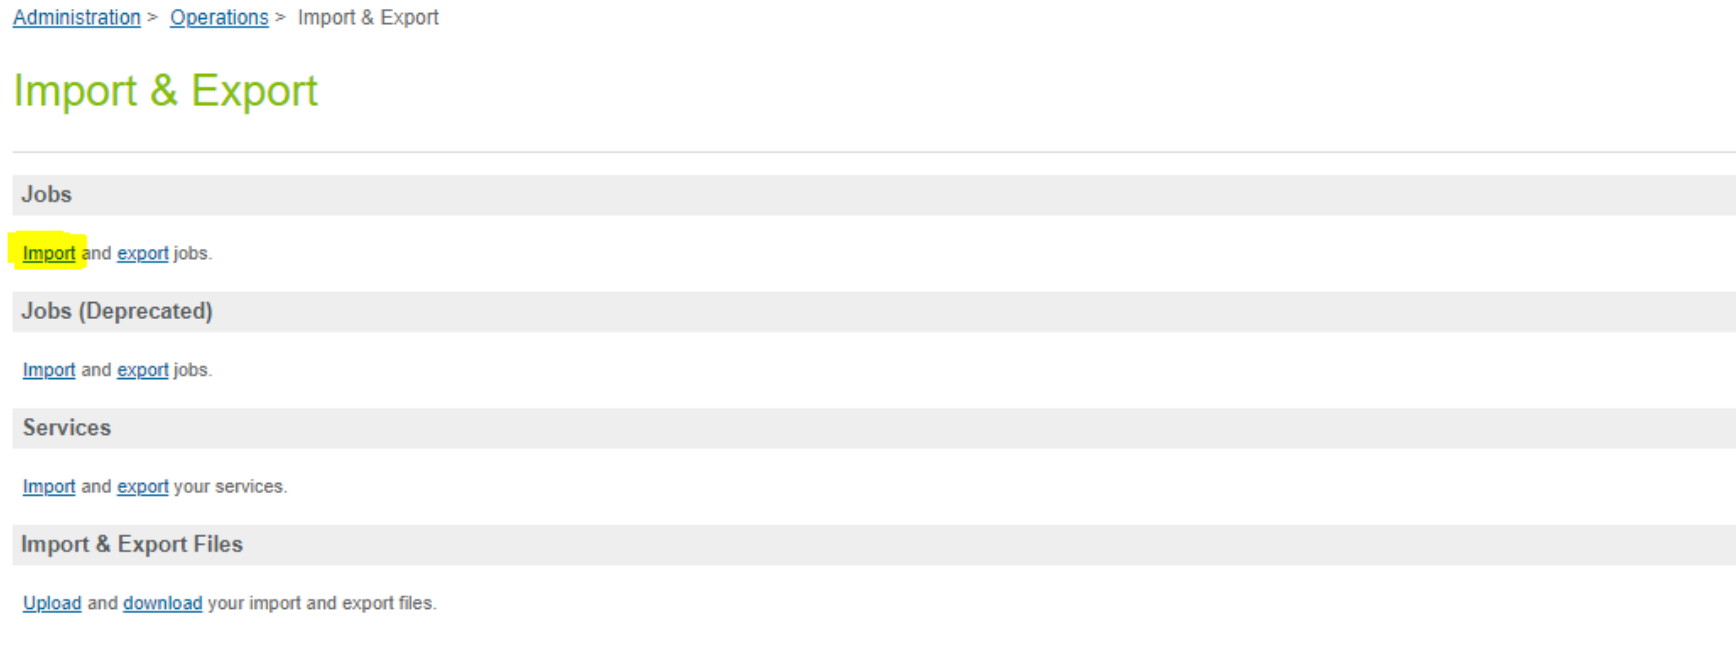
- Navigate to Administration -> Operations -> Import & Export
-
Select Upload under Import & Export Files:
Select Upload - Upload brightcove-jobs.xml from the meta directory of the zip file.
- Navigate to Administration -> Operations -> Import & Export.
-
Select the Import option under Jobs:
Select Import - Import the
brightcove-jobs.xmlfile. -
Select site context for the jobs listed below:
Brightcove-BulkAssignBrightcove-BulkUpload
-
Create three jobs manually:
- Bulk Assign
- Bulk Upload
- Clean Brightcove Folder
Information you will need to create the jobs is in the table below. Here are the steps for creating each job:
- Navigate to Administration -> Jobs.
- Create a New Job.
- End the Step ID.
- Select the scope.
| Job Name | Step ID | Scope |
|---|---|---|
| Bulk Assign | custom.bulkAssign |
Specific-site |
| Bulk Upload | custom.bulkUpload |
Specific-site |
| Clean Brightcove Folder | custom.CleanFolderBrightcove |
Organization |
Add Brightcove Features Under Roles & Permissions
- Navigate to Administration -> Organization -> Roles & Permissions.
- Select role from the list to grant access to Brightcove features.
- Select Business Manager Module.
-
Select Site Context:
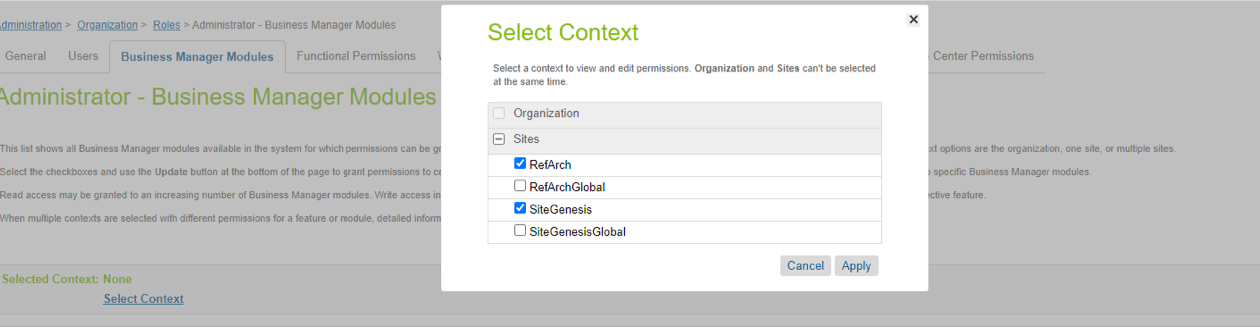
Select Site Context - Apply context.
- Scroll down to the Brightcove section.
-
Select all the features and click Update:

Update Roles and Permissions
Configure Custom Site Preferences
-
Select a Site from the dropdown menu:
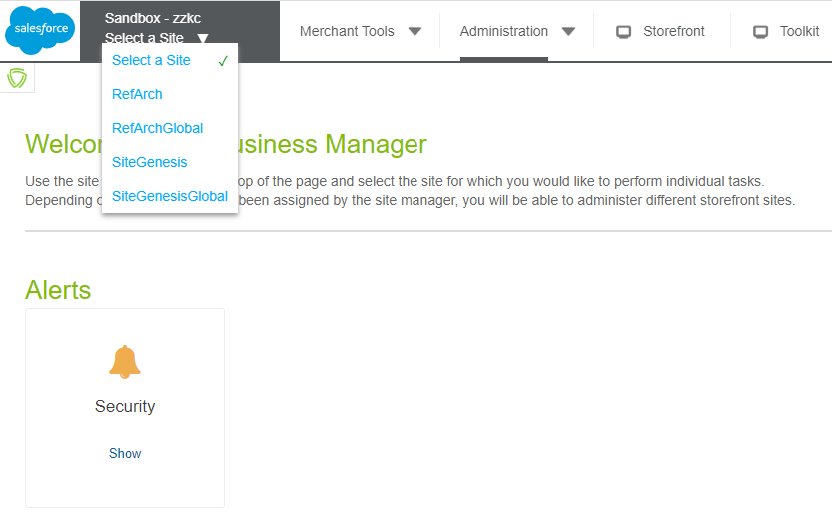
Site Menu - Navigate to Merchant Tools -> Site Preferences -> Custom Preferences.
- Select Brightcove.
-
Add the following values:
- Brightcove Account ID
- Brightcove Client ID
- Brightcove Client Secret
- Site Catalog
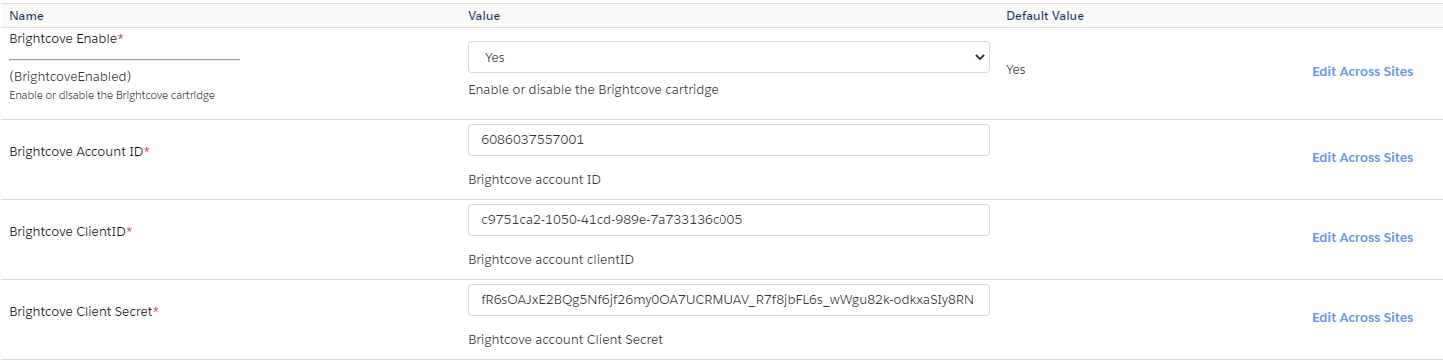
Custom Preference Values - 1 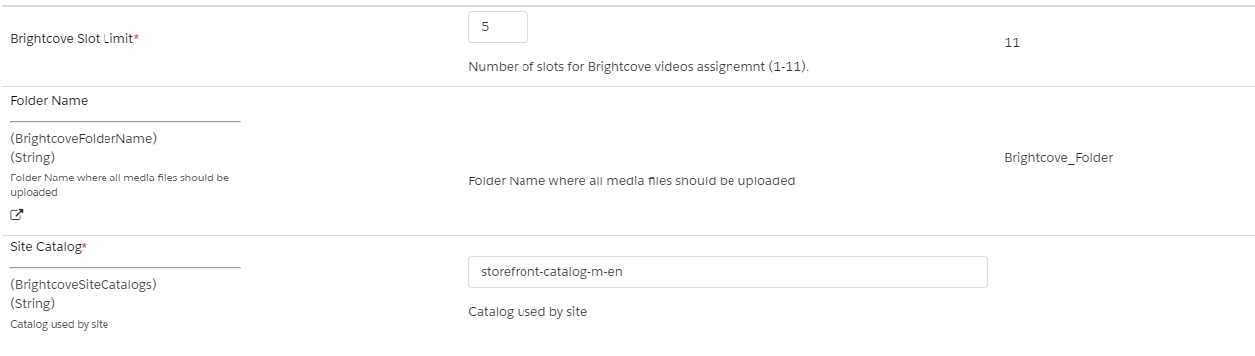
Custom Preference Values - 2 -
Add the Brightcove Slot Limit (1 - 11). The default is 11.
- Slots for Master Products (master and m1-m10)
- Slots for Variant Products (v1 - v11)
- Slots for the Standard Product (v1 - v11)
- Slots for Product Sets (ps1-ps11)
- Slots for Product Bundles (pb1-pb11)
- Slots for Variation Groups (vg1-vg11)
- Slots for Categories (c1 - c11)
- A Slot limit of 5 will provide these slots for configuration:
- Master Products (master and m1-m4)
- Variant and Standard Products (v1 - v5)
- Product Sets (ps1-ps5)
- Product Bundles (pb1-pb5)
- Variation Groups (vg1-vg5)
- Categories (c1 - c5)
Include Brightcove Video Rendering in ISML Files
SFRA Cartridge – app_brightcove
-
Video rendering is supported for the below ISML files:
productDetails.ismlcatLanding.ismlsearchResultsNoDecorator.ismlbundleDetails.ismlsetDetails.isml
-
Include
modules.isml:<isinclude template="modules"> -
Include the tags from
modules.ismlto render video:- Master Product Video
<isM1>- this will render the video assigned to the m1 slot - Variant Product Video
<isV1>- this will render the video assigned to the v1 slot - Standard Product Video
<isV1>- this will render the video assigned to the v1 slot - Product Set Video
<isPS1>- this will render the video assigned to the ps1 slot - Product Bundle Video
<isPB1>- this will render the video assigned to the pb1 slot - Variation Group Video
<isVG1>- this will render the video assigned to the vg1 slot - Category Video
<isC1>- this will render the video assigned to the C1 slot
- Master Product Video
SiteGenesis Cartridge – int_brightcove
-
Video rendering is supported for the below ISML files:
productcontents.ismlproducttopcontent.ismlproducttopcontentPS.ismlcategoryproducthits.ismlcatlanding.isml
-
Include
modules.isml:<isinclude template="modules"> -
Include the tags from
modules.ismlto render video:- Master Product Video
<isM1>- this will render the video assigned to the m1 slot - Variant Product Video
<isV1>- this will render the video assigned to the v1 slot - Product Set Video
<isPS1>- this will render the video assigned to the ps1 slot - Product Bundle Video
<isPB1>- this will render the video assigned to the pb1 slot - Variation Group Video
<isVG1>- this will render the video assigned to the vg1 slot - Category Video
<isC1>- this will render the video assigned to the C1 slot
- Master Product Video