Introduction
After installation of the Brightcove Video Connect for Sitecore, you must create and configure the Brightcove Tenant in Data Exchange Framework that will allow the synchronization of data between your Sitecore environment and the Brightcove Video Cloud. The sections below will walk you through the various parts of the configuration.
Create Brightcove Tenant
- Link your Brightcove Video Cloud account to the Sitecore environment as described in the Linking Video Cloud Accounts section below.
- In the Sitecore Launchpad, open the Content Editor.
- Go to
/sitecore/system/DataExchange and right-click on Data Exchange. - In the Insert menu, click Brightcove Tenant.
- Go to
/sitecore/system/Data Exchange/<tenant name></tenant>. On the Content tab, in the Administration section, click Enabled. - Save the item.
Configure a Brightcove Endpoint
To configure an endpoint for the tenant:
- In the Content Editor, go to
/sitecore/system/Data Exchange /Brightcove Tenant/Endpoints/Providers/Brightcove/Web API Endpoint. - In the Settings section, under Account, select the linked Brightcove Video Cloud account from the dropdown control.
- Save the item.
Run Sync Pipeline Batch to Sync with Video Cloud
After creating and configuring the Brightcove Tenant, you are ready to sync your Sitecore 10.1 environment with the Brightcove Video Cloud to populate Sitecore with your media assets – videos and playlists – from your Brightcove account. To do so, follow the steps below.
- In the Content Editor, go to
/sitecore/system/Data Exchange /Brightcove Tenant/Pipeline Batches. - Select the Sync Pipeline Batch.
- On the Data Exchange tab, click Run Pipeline Batch.
- Confirm the sync by going to
/sitecore/Media Library/Brightcove/<name of account>. - Right-click the
<name of account>and click the Refresh menu item. - Confirm that the Videos and Playlists folders are now populated. You can also confirm a successful sync by searching for videos and playlists and confirming that you get positive search results.
Release Page Events from Workflow
The Brightcove Video Connector for Sitecore includes a number of page events that must be released from workflow and published before they can be used.
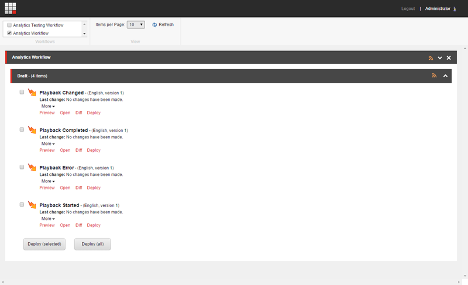
- Open the Sitecore Workbox.
- Select the Analytics Workflow.
-
Deploy the following page events:
- Playback Changed
- Playback Completed
- Playback Error
- Playback Started
- Publish the page events.
Configure Reporting Database
For the Sitecore reports to work, a new fact table must be added to the Experience Database (xDB) reporting database. A script that will create this new table is available on SDN. You must run this script on your xDB reporting database. This step should be completed by your database administrator.
Linking Video Cloud Accounts
The following sections walk you through how to create an account in Sitecore that corresponds with a Brightcove Video Cloud account.
Get Account Credentials from Brightcove
For Sitecore Data Exchange Framework (DEF) to connect to Brightcove Video Cloud, the account credentials from Brightcove must be added to Sitecore. This section describes how to locate the account credentials in Brightcove. The following steps describe how to add those credentials to Sitecore.
-
Log into Brightcove Video Cloud. Note the Account ID value. You will need to enter this into Sitecore in the following section.
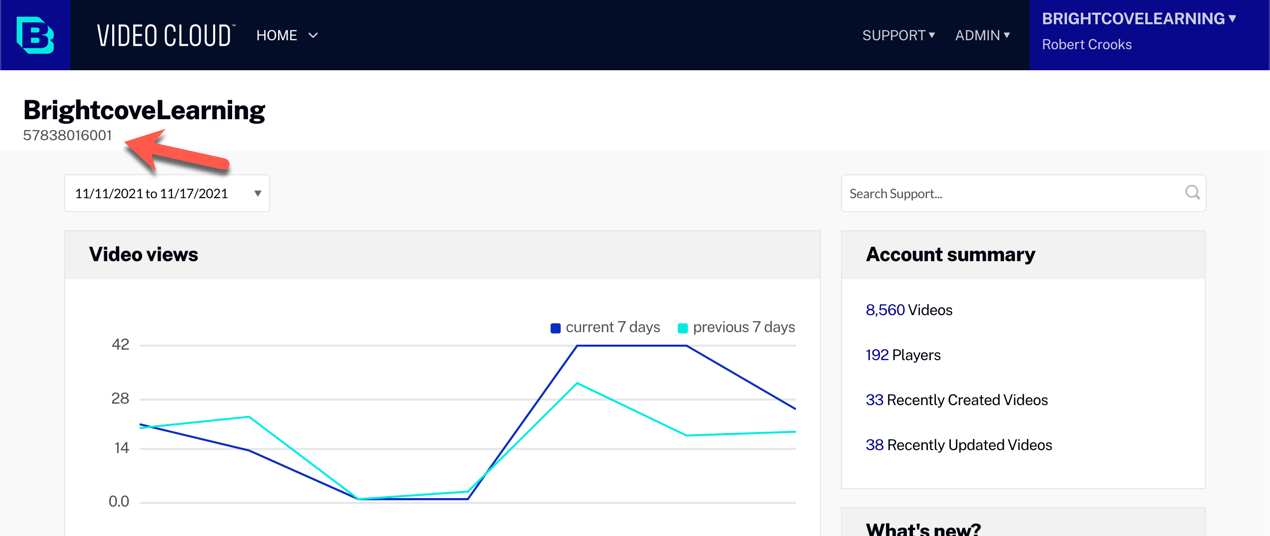
Account ID -
Select API Authentication under Admin.
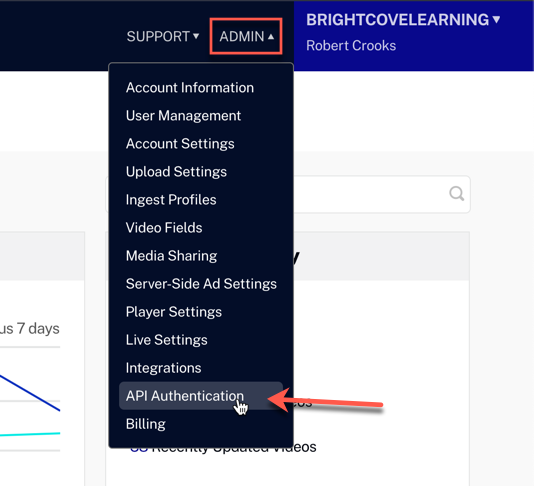
Go to API Authentication -
Click Register New Application
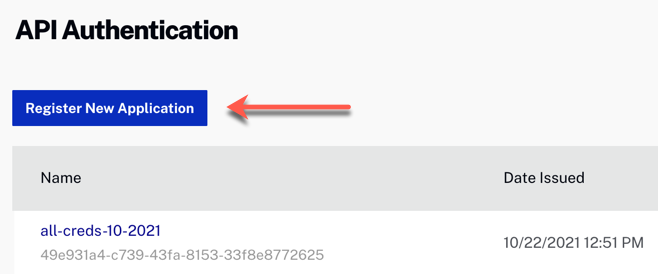
Register New Application -
In the dialog that opens, enter a Name, select the Account, select the APIs as shown below, and then click Save.
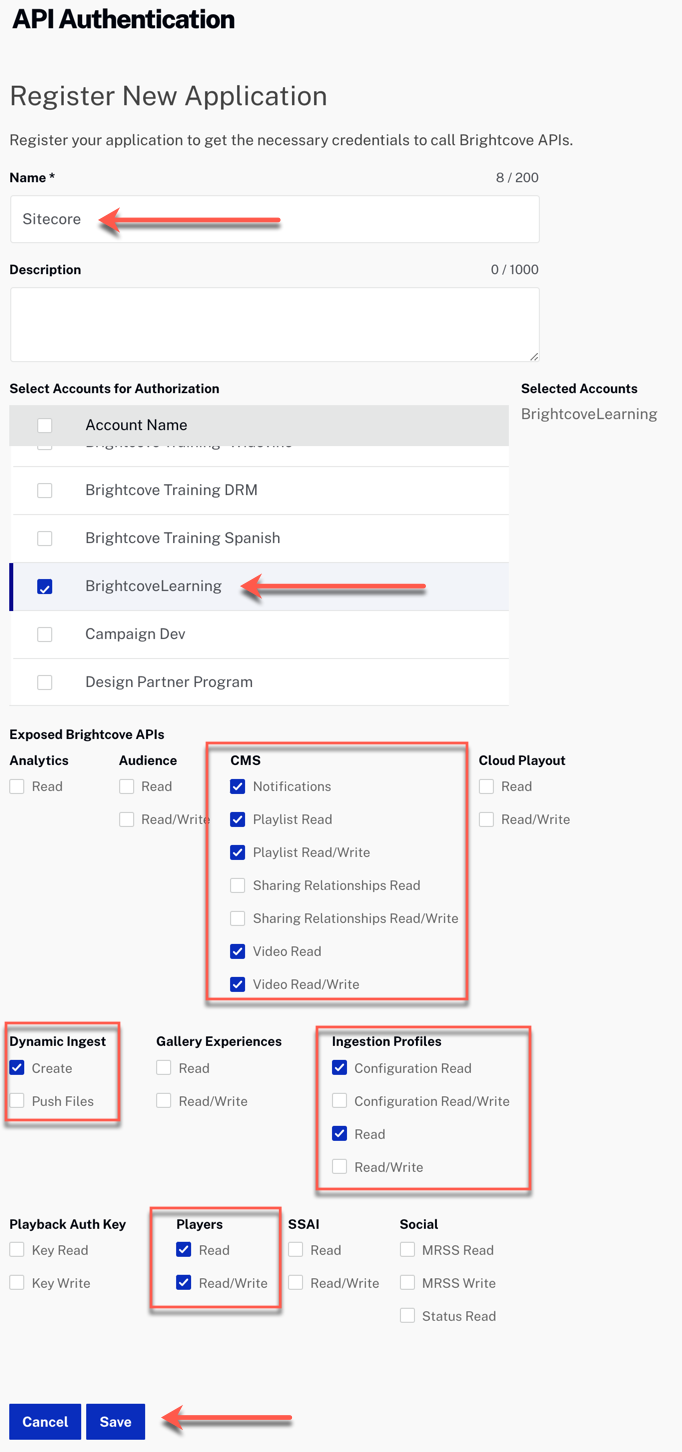
Registar Application Dialog -
A new dialog will appear with your Client ID and Client Secret. Be sure to copy and save these - there is no way to retrieve the client secret again once this dialog is closed.
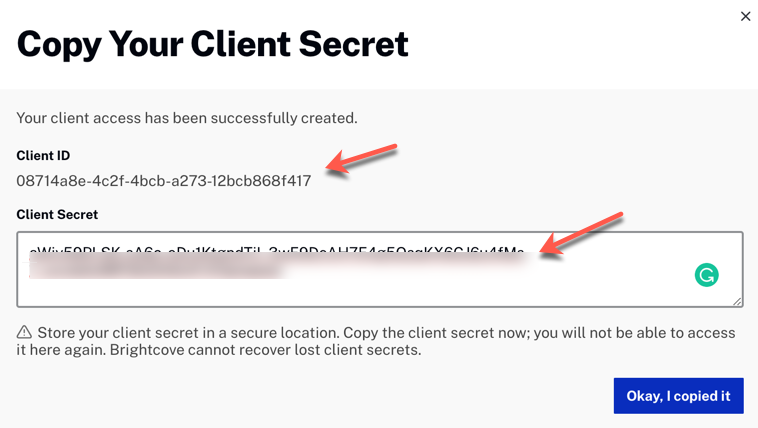
Client Credentials
Add Brightcove Account to Sitecore
Now you will add the Brightcove credentials to Sitecore to enable the connection between them.
- Log into the Sitecore Desktop.
- Open Media Library.
- Navigate to Media Library > Brightcove.
- Add a new Brightcove Account item.
-
Enter the following values obtained from Brightcove in the earlier steps:
Account IDClient IDClient Secret
Next steps
The configuration of the Brightcove-Sitecore connection is now complete. You can proceed to the User Guide.