Introduction
| Version | Documentation | Download | Compatibility Notes |
|---|---|---|---|
| 4.1.2.0 | Documentation | Plug-in and source * | SharePoint 2019 On-premise, SharePoint 2019 Online (Office 365), Brightcove CMS & DI API's, Brightcove HTML5 Player
|
| 4.0.1.0 | No longer supported | EOL | This version of the connector is no long supported |
| 3.0.2.0 | Skip to 4.0.x.x Release | EOL | No longer supported |
| 2.0.2.66 | Training Doc | EOL | SharePoint 2013/2016 On-premise, SharePoint 2016 Online (Office 365), Brightcove CMS & DI API's, Brightcove HTML5 Player |
| 1.1.2.8 | Training Doc | EOL | No longer supported |
* © 2019 Brightcove
Licensed under the Apache License, Version 2.0 (the "License"); you may not use this file except in compliance with the License. You may obtain a copy of the License at http://www.apache.org/licenses/LICENSE-2.0. Unless required by applicable law or agreed to in writing, software distributed under the License is distributed on an "AS IS" BASIS, WITHOUT WARRANTIES OR CONDITIONS OF ANY KIND, either express or implied. See the License for the specific language governing permissions and limitations under the License.
For help with this connector, please fill out this worksheet and include it with a support ticket to Brightcove customer support.
Contents
Installing Brightcove Video Connect for SharePoint
Before you begin installation, review the following information about prerequisites and permissions:
- Before a user can add an app for SharePoint, a member of the Farm Administrators group must configure the environment to support apps for SharePoint. For more information, see Configure an environment for apps for SharePoint 2013 or SharePoint 2016 or SharePoint 2019.
- A user must have the Manage Web site and Create Sub-sites permissions to add an app for SharePoint. By default, these permissions are available only to users who have the Full Control permission level or who are in the Site Owner's group.
- When a user adds an app for SharePoint, the app requests permissions that it needs to function (for example, access to Search, or to create a list). Users who do not have those permissions are informed that they do not have sufficient permissions and the app cannot be added. The user can contact a Site or farm administrator to see if the administrator can add the app.
- A user logged in to a Site as the system account cannot install an app. The system account cannot import app licenses because that could result in performance problems.
Adding the Brightcove Video Connect App to the App Catalog
Setting Up App Catalog
To install the Brightcove connector, the first step is to set up the App Catalog in SharePoint. Use the references below to complete this step.
- Manage the App Catalog in SharePoint 2013
- Manage the App Catalog in SharePoint 2016
- Manage the App Catalog in SharePoint 2019
Adding the Brightcove Video Connect App to the catalog
Once the App Catalog is setup, follow the steps listed below:
- Verify that the user account that is performing this procedure is a member of the Site Owners or Designers group for the App Catalog.
- On the App Catalog Site, click the Apps for SharePoint list.
- On the Apps for SharePoint page, click new item.
- In the Choose a file box, click Browse, and then locate the folder that contains the BrightcoveConnectorApp file.
- Select the App, and then click Open.
- Click OK to upload the App.
- In the Item details box, supply the Name, Title, Short Description, Icon URL, and other settings for the App. Be sure that the Enabled check box is selected so that users can see the App in their Sites. You can select the Featured check box to list the App in the Featured content view of the App Catalog.
- Click Save.
Installing the Brightcove Video Connect App in a Site
Follow the steps listed below to install the Brightcove connector in a Site:
- Verify that the user account that is performing this procedure is a member of the Site Owners group.
- To add the app, go to Site contents:
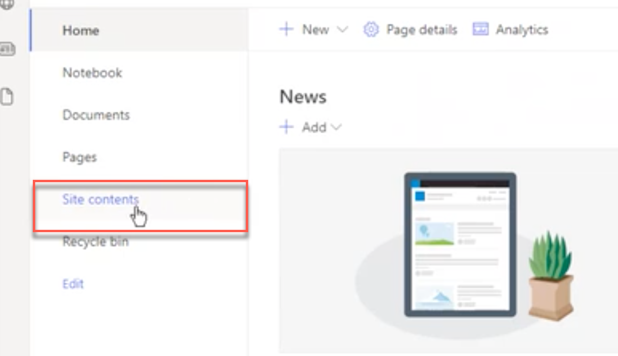
Go to Site Contents -
Click the New dropdown, and select App
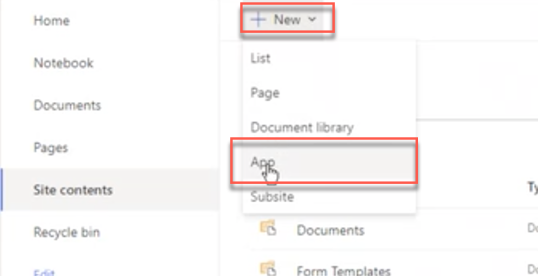
Select New App -
In the My apps page, that appears, select the Brightcove Video Connector app and click Add:
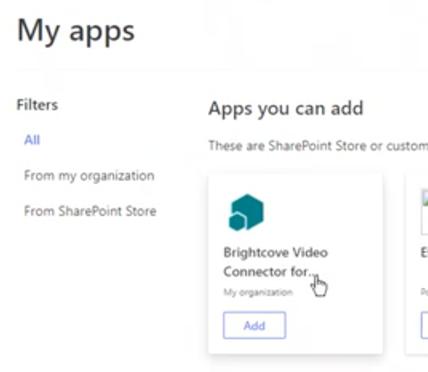
Select the Brightcove App - In the Grant Permission dialog box, click "Trust it".
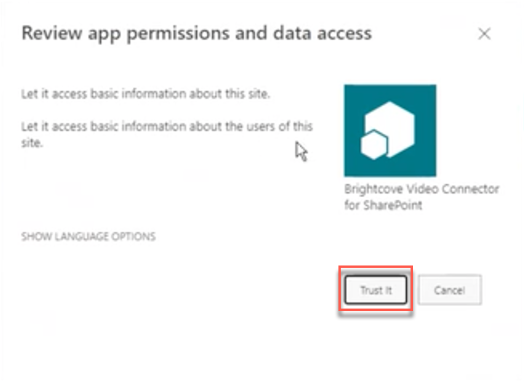
Grant Permissions -
At this point, the BrightcoveConnector App for SharePoint is added and appears in Apps section of your Site Contents list. It is now available for use in the Site:
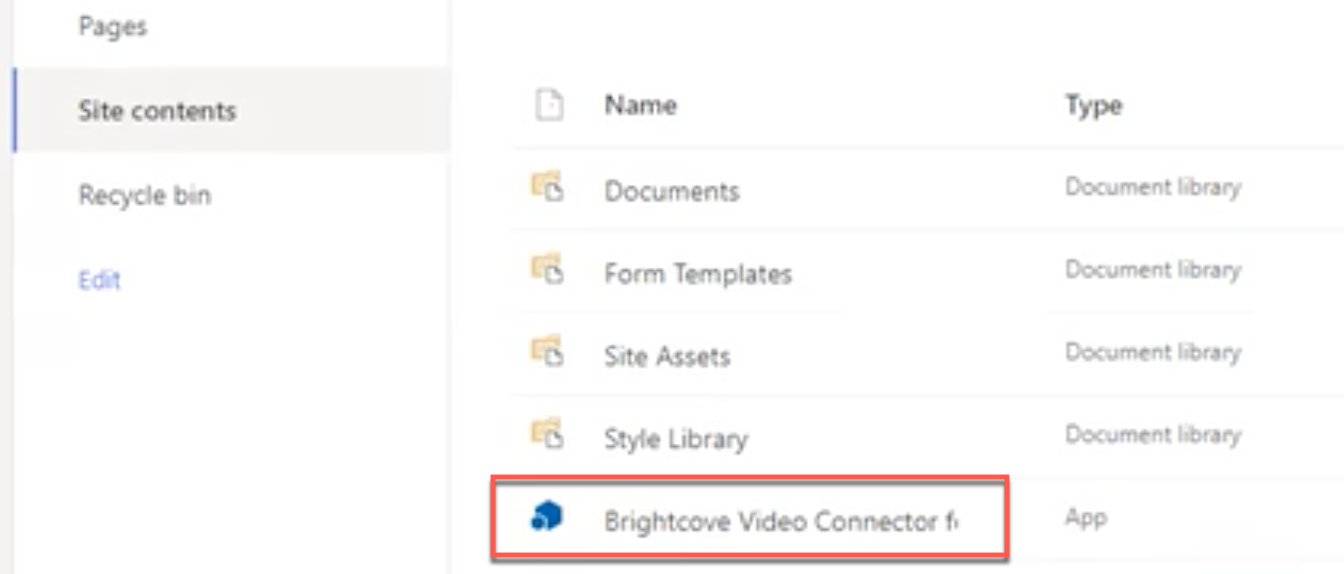
Brightcove App Added
Configuring the Brightcove Video Connect App
Below are the configuration steps required after the app is added.
-
Click on the Brightcove Video Connector item in the Site Contents List:

Click Here to Configure -
A new page will open, and a message will appear indicating that no accounts are defined - this refers to Brightcove accounts to be used with Sharepoint:

No Accounts Defined Message - Close the message.
-
In the Account Management settings that appear, click on Add New Account:

Add New Account -
In the New Account settings, you will click on the various buttons to enter information about your Video Cloud account - if you don't have the information at hand, you can get it from Video Cloud Studio as indicated below:
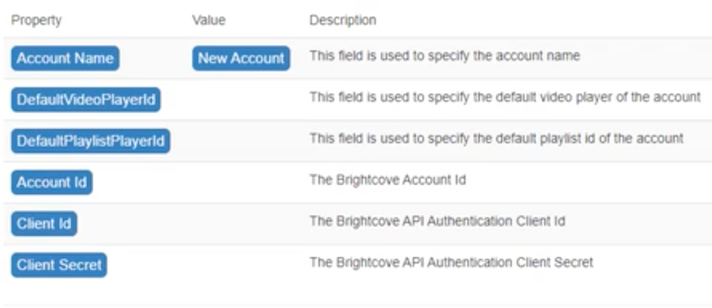
New Account Settings Getting information in Studio
-
Account Name and Account ID can be found on the Account Information page under Admin:
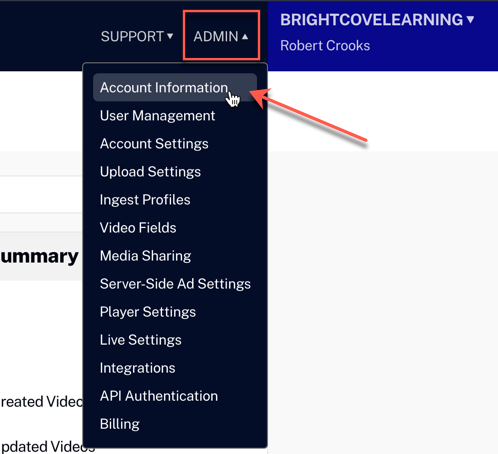
Account Information Page -
DefaultVideoPlayerID and DefaultPlaylistPlayerID can be found by going to Players module:
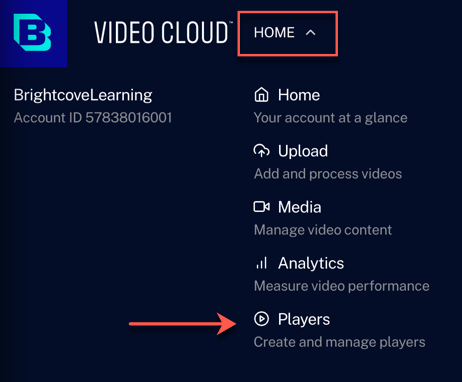
Players Module The player ids can be seen under the names in the players list:
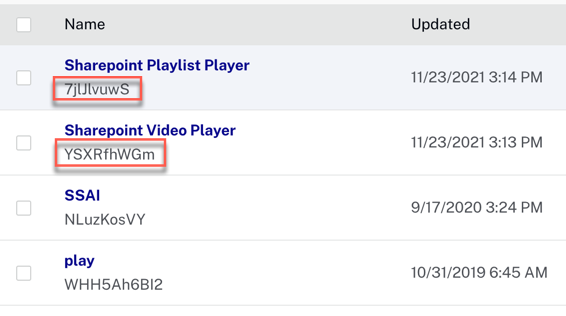
Player IDs If you need to create new players for your account, see:
-
If you have not already created your Client ID and Client Secret, go to API Authentication under Admin in Studio, and follow the instructions in Managing API Authentication Credentials:
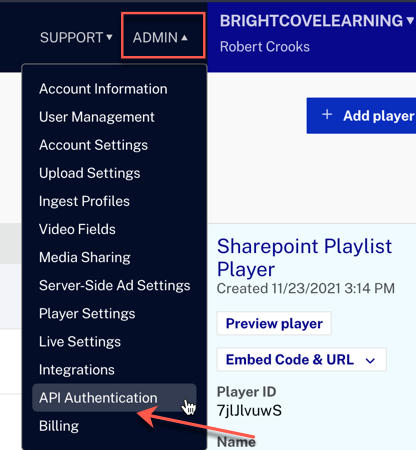
API Authentication The minimum permissions you need for your client credentials are:
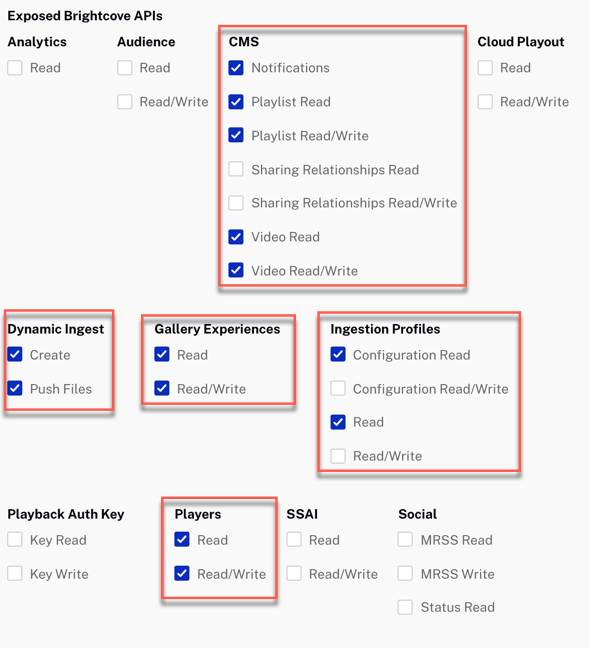
Minimum API Permissions -
For the Author's Group and Viewer's Group, you can select from the dropdown of Sharepoint groups you have defined:
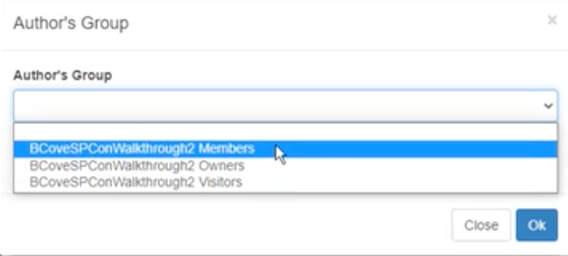
Selecting Authors and Viewers Groups
-
Account Name and Account ID can be found on the Account Information page under Admin:
- After you have entered all the necessary information, click Save Account.
Launching Brightcove Video Connect for SharePoint
To launch the application, the user can click on the BrightcoveConnector App within the Site Contents listing.
You will be brought to the Home Page of the Connector App.
The main navigation in the left column of the Connector is always present and allows the user to navigate all of the sections they have access to (see the section above regarding permissions). Below is a brief description of the purpose of each component of the Connector:
- Home - The landing page when first entering the Connector.
- Account Management - Provides the interface for entering the Brightcove Video Cloud account(s) information into SharePoint.
- Add Videos - Upload new videos into Video Cloud. A video object is also created in SharePoint (except for the actual video file).
- Manage Videos - Browse and edit existing videos as well as import videos from Video Cloud into SharePoint.
- Manage Playlists - Create new playlists as well as browse and manage existing playlists.
- Manage Experiences - Create and manage In-Page Experiences.

Account Management Page
The Account Management Page displays the current list of configured accounts, along with the assigned groups for Authors and Viewers.
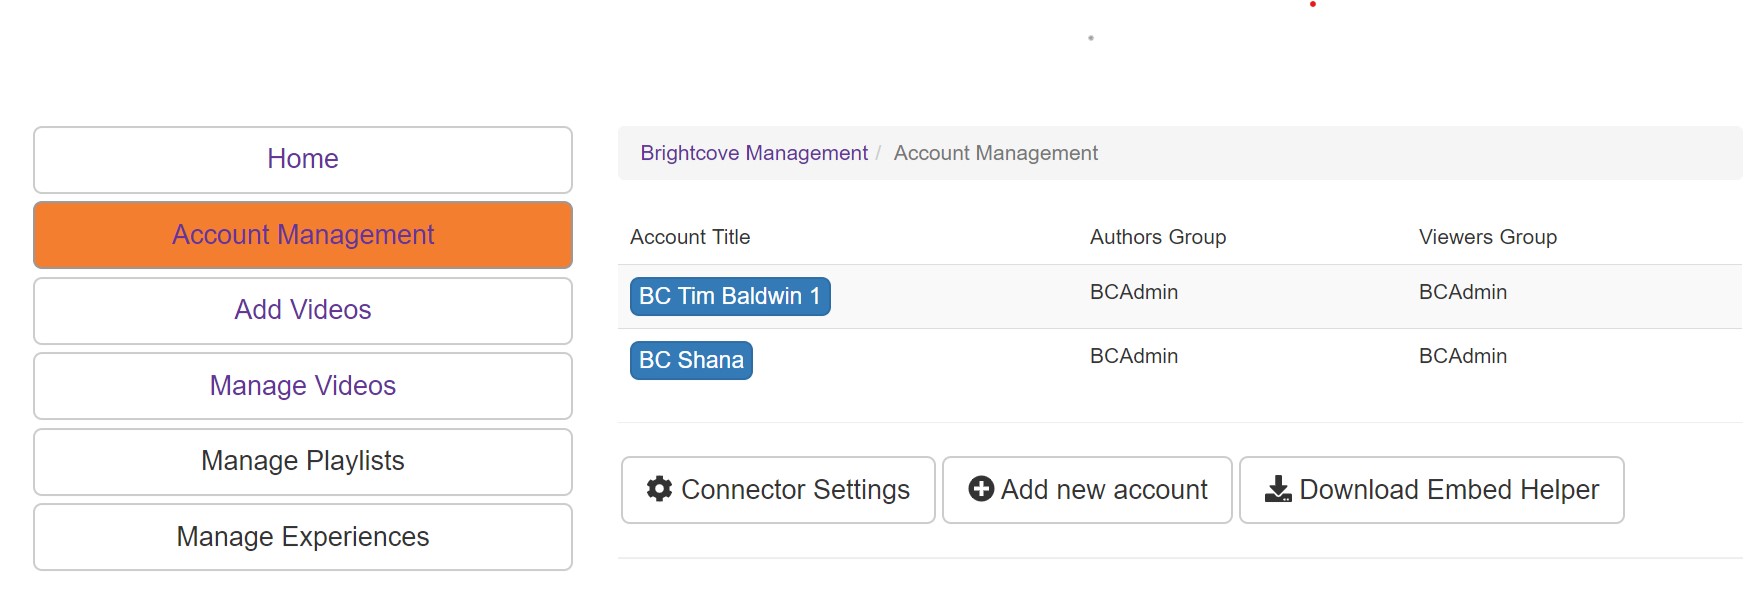
- Account Title - Accounts currently configured (or at least created).
- AuthorsGroup - SharePoint group assigned "Author" rights for the account.
- ViewersGroup - SharePoint group assigned "Viewer" rights for the account.
- Add new account - Open the account creation screen to setup a new account.
