Introduction
The Brightcove Video Connector for Shopify allows you to use videos from video cloud in your product pages, also to live stream into your store, and to check viewership, performance and engagement analytics within the Shopify app. It also allows you to upload videos to Video Cloud from the app. These operations are detailed in the sections below.
Guidelines tab
In the Guidelines tab you will find instructions for configuring the app.
Viewing videos
To view existing videos in your Video Cloud account, click the Videos:
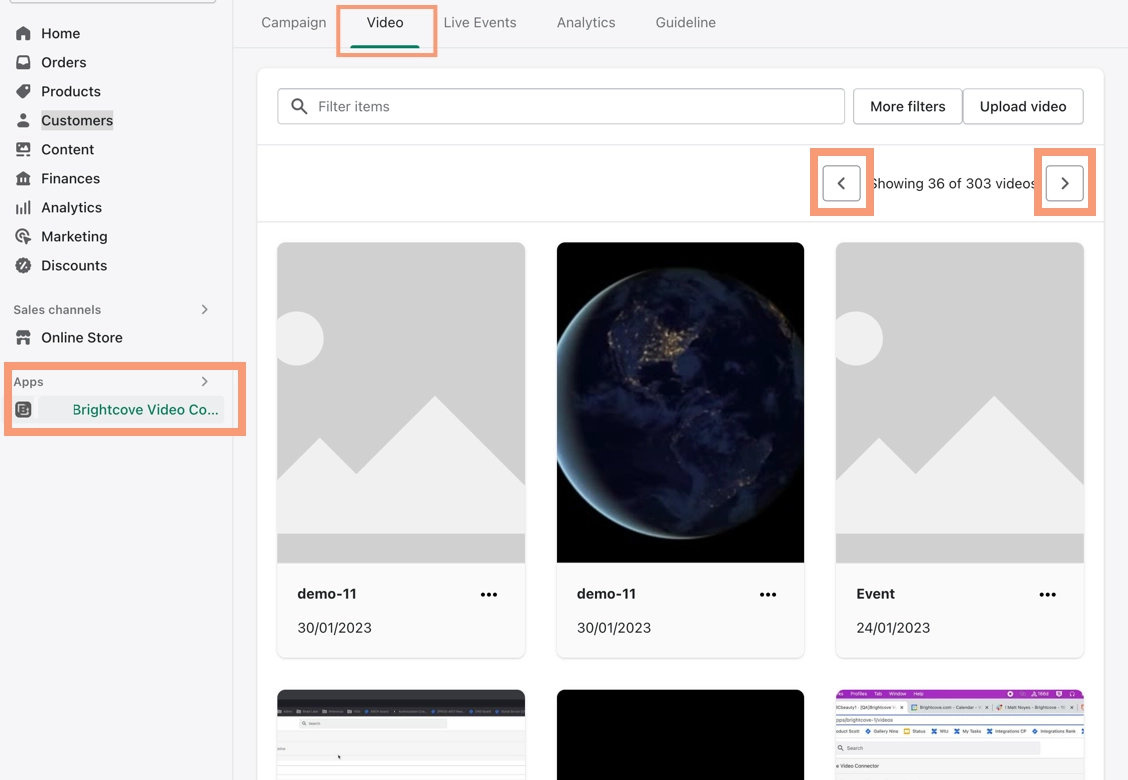
Twelve videos are displayed at a time, and you can navigate through the collection using the forward and back arrows highlighted in the image above.
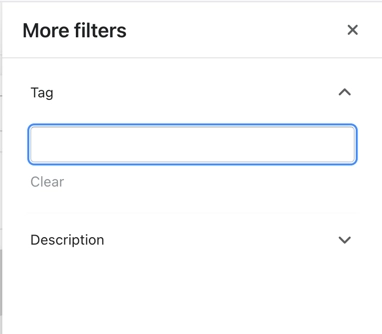
Filtering the video list
To filter the video list by words that appear in the title, enter those words in the filter box:

You can also filter by tag and or description by clicking :
Uploading videos
- To upload new videos, click .
- In the Upload Video dialog, enter a Name (required), a description (optional), and tags (optional) for the video.
- Click .
The video will now be available in Shopify and Video Cloud Studio.
Video options
To access the options for any video click the 3 dots under the video to reveal the options menu:
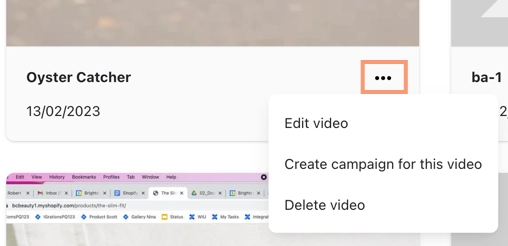
We will look at these options in sections below.
Edit video
- Click the 3 dots under the video and select the Edit Video option in the menu.
-
In the Video Details dialog, make any changes you want to the Name, Description, and Tags:
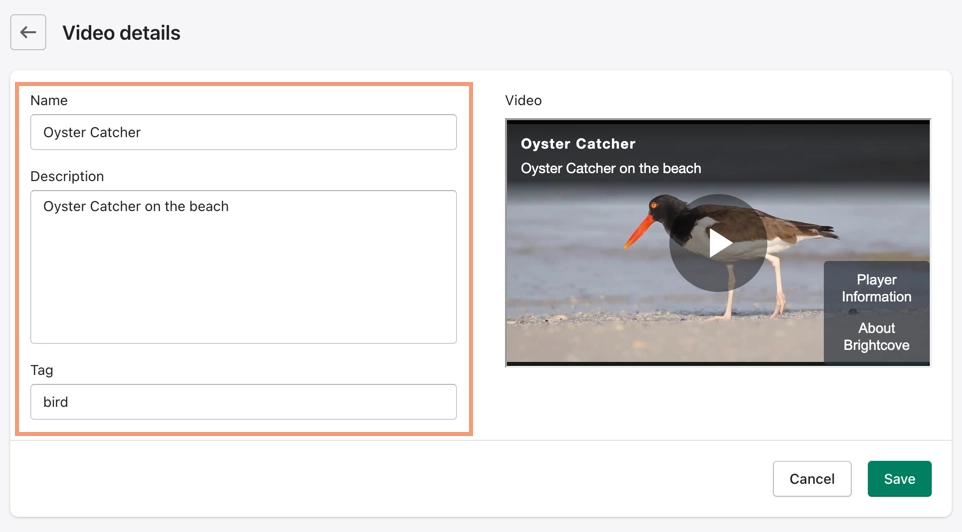
Video Details - Click to save your changes.
Delete video
- Click the 3 dots under the video and select the Delete video option in the menu.
-
In the Video Delete dialog, click to complete the deletion of the video:
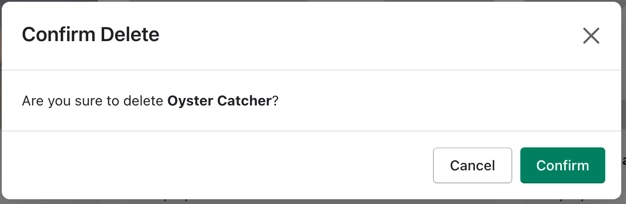
Delete Video
Create campaign for video
Campaigns are used to add your videos to particular product pages in Shopify.
- Click the 3 dots under the video and select the Create campaign for this video option in the menu.
-
In the New Campaign dialog, add a Name (required), Description (optional) and tags (optional). Also select or change the video:
Create Campaign - Click to save your changes.
- Wherever you create the campaign from, the Campaigns tab will now open and show your campaign at the top of the list.
-
To add the campaign/video to a product page, click edit to edit the campaign:
Edit Link for Campaign -
A Product section will appear at the bottom of the campaign edit dialog - click the add link to add a product:
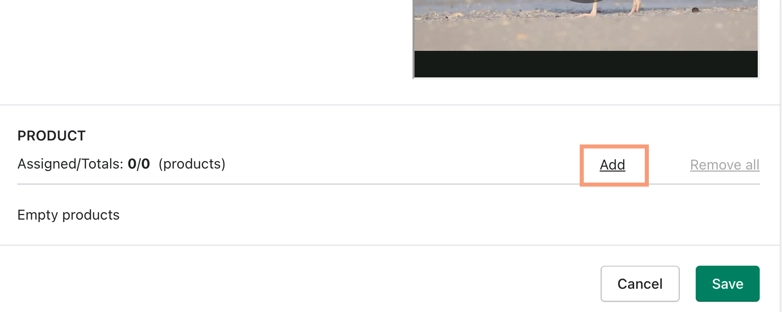
Add Link to Add Product -
In the product selector, you can search for and add one or more products to associate the campaign with:
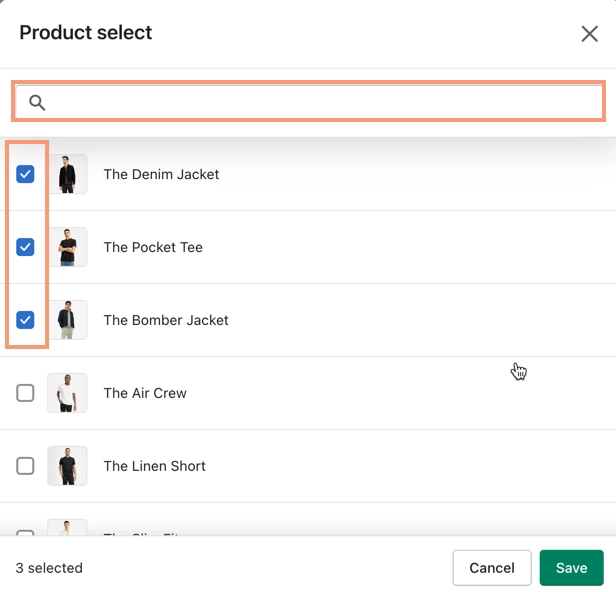
Product Selector for Campaign -
For each product you select, you can now set the position of the video in the product page:
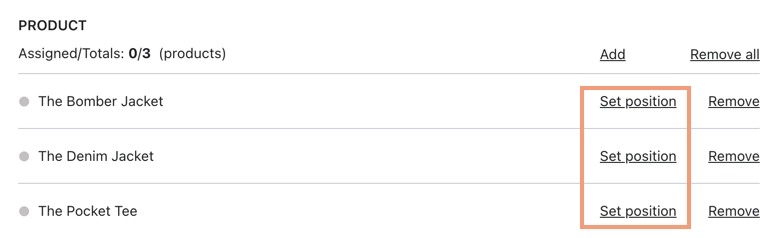
Set Position of Videos -
The Set Position dialog gives you the option of typing a (CSS) Selector or choosing one from the product page:
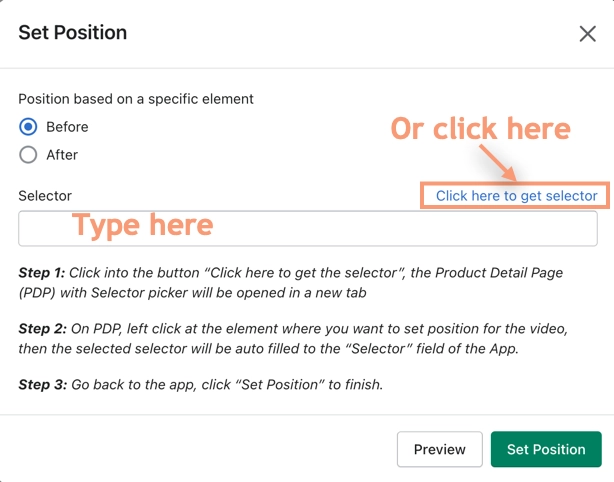
Set Position Dialog -
If you choose to get a selector from the product page, you will see the product page, where first you must choose whether your video will be placed before or after the element you select:
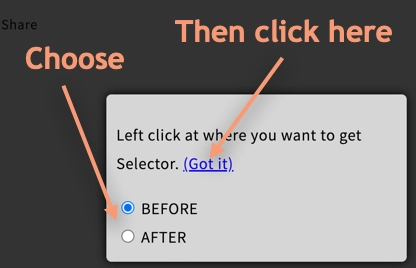
Choose Before or After -
Mouseover items in the product page and click on the one you want you want to place the video before (or after):
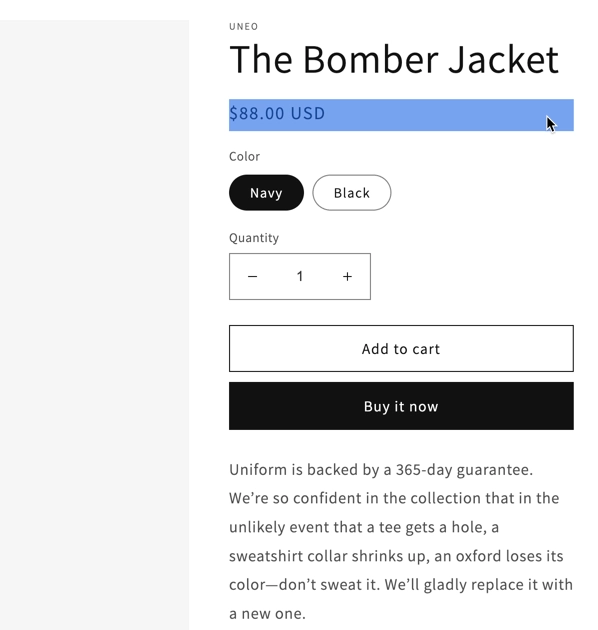
Find a Selector -
When you click an element to select it, you will see a preview of the video position - and also notice the note at the bottom of the page:
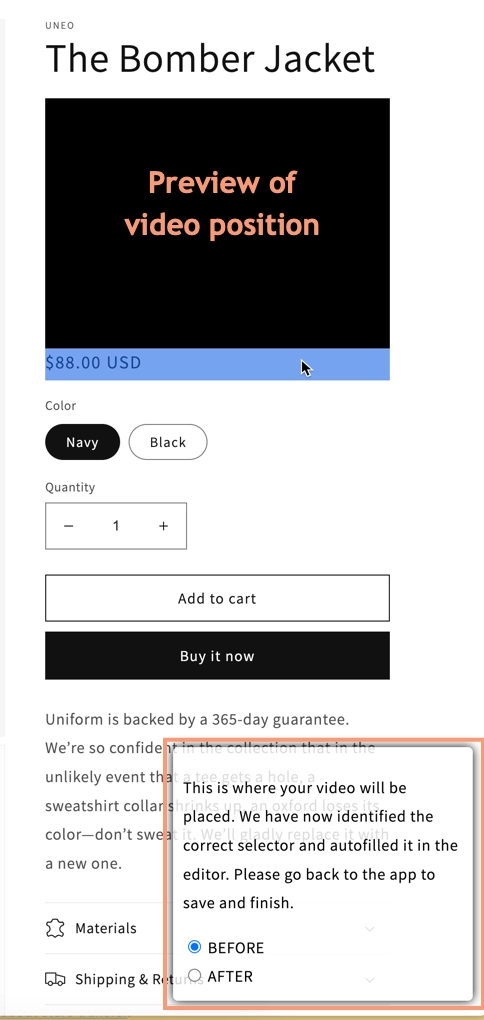
Preview Video Position -
When you close the product page, you will see the Selector field in the dialog filled, and you must click to complete adding the video to the page:
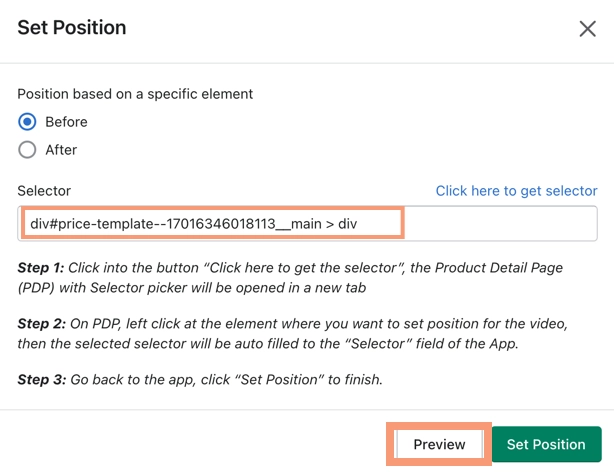
Selector Field Filled -
You can also click Preview to see and play the video in the product page (you can click Set Position by the the product to reopen that dialog to see the preview anytime, or simply go see it in your online store):
Preview of Video in Product Page
Viewing campaigns
To view existing campaigns, click the Campaigns:
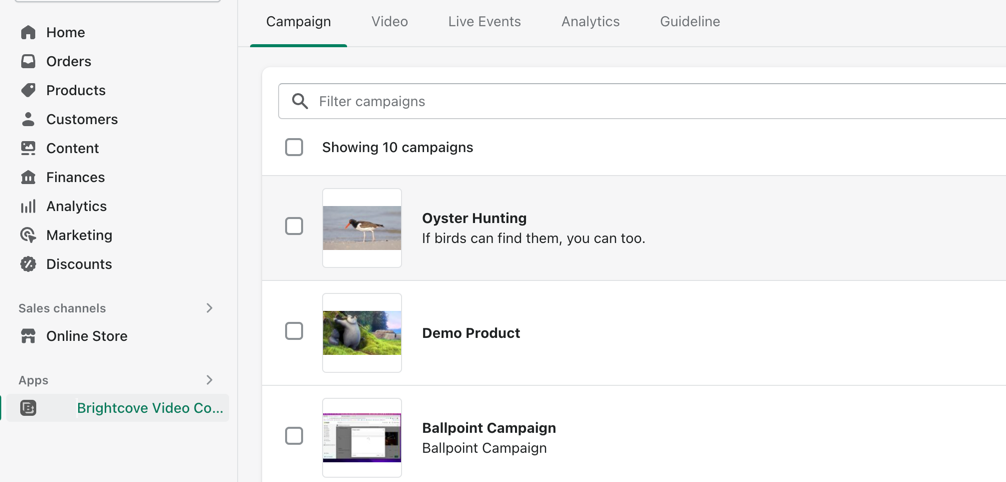
All your campaigns are displayed.
Filtering the campaign list
To filter the campaign list by words that appear in the title, enter those words in the filter box:

You can also filter by tag and or description by clicking :
Create new campaign
To create a new campaign, click .
The rest of the process is the same as when you create a campaign for a video in the Videos tab.
Delete campaigns
You can delete campaigns you no longer need by selecting one or more in the list:
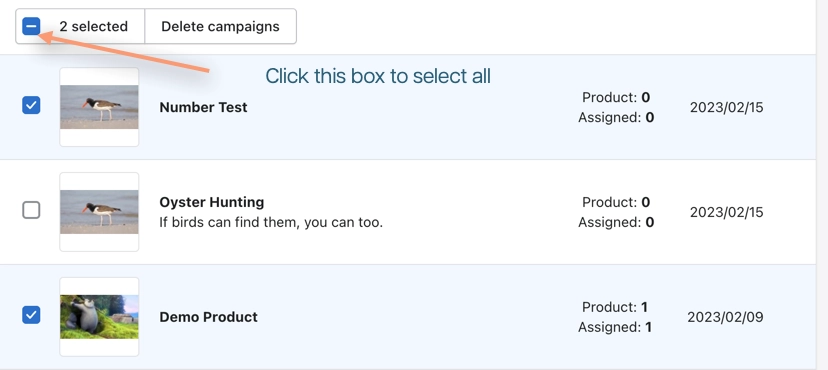
Once you have selected the campaigns you want to delete, click .
To complete the deletion, click in confirmation dialog:

Viewing analytics
Go to the Analytics tab to view Analytics for your videos:
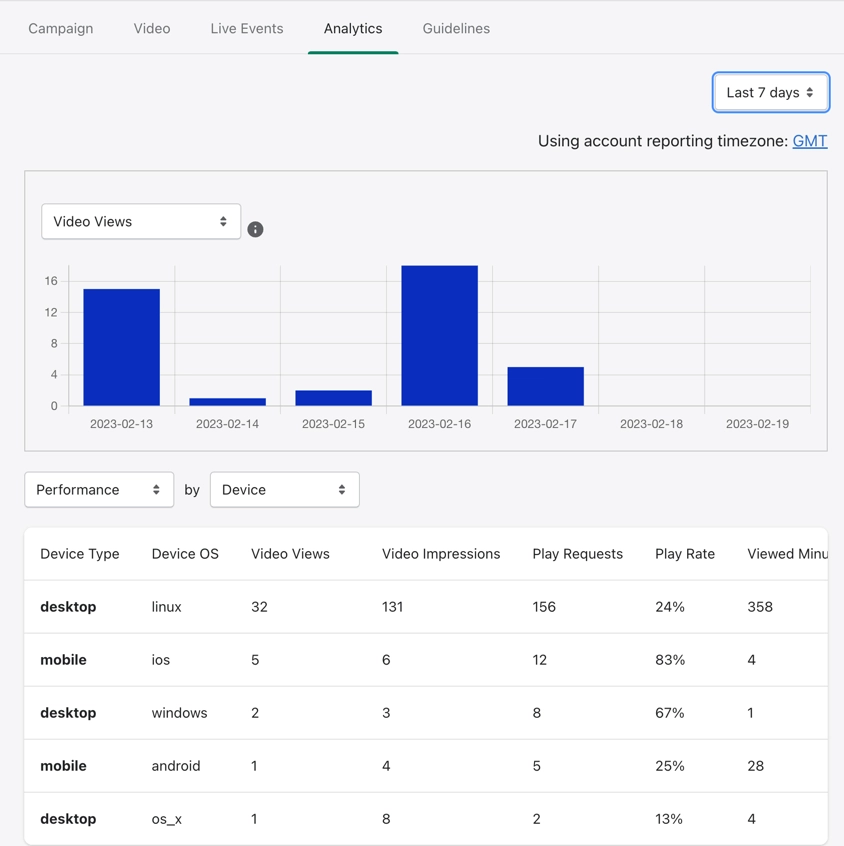
There are a number of options here to allow you to filter the data in different ways.
Date range selector
The date range selector gives you a variety of standard date ranges to view analytics for, and also the ability to select your own date or date range:
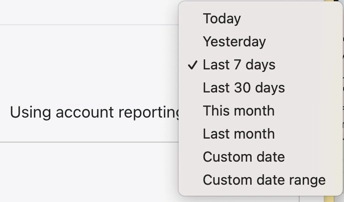
You can also change the time zone for the reports by clicking the GMT link below the date range selector. The link will take you to Video Cloud Studio, where, if you are an admin for the account, you can change the time zone by following these instructions.
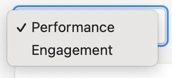
Report type
There are two basic types of reports you can view:
- Performance reports
- Performance reports provide general information about the performance of the video content such as how many times videos were viewed, what devices they were viewed on, how many seconds of the video was watched, and so forth.
- Engagement reports
- Engagement reports show you how many views there were at different points in a video - remember that these are views, not viewers, so for example, if someone kept moving the playhead back and rewatched the last few seconds of the video 10 times, that would count as 10 views at that point. The trends can still be revealing, however. A sharp decline in views early in the video, for example, suggests that it is not generally appealing, while a sharp decline later in the video might indicate a boring part or something that suggests to viewers that the video is essentially over.
You can switch back and forth between performance and engagement reports using the report type selector:
Performance report types
When you are viewing performance reports, there are many kinds that you can choose from using the subtype selector to the right of the report type selector:
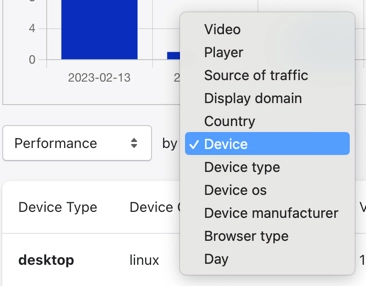
The different reports are useful in various ways. For example, for your business model, it may be particularly useful to know whether the viewers are predominantly on desktop computers or mobile devices, or which countries most of the views occur it. Similarly, you may want to view data by day, because it is important to you to know if viewers are looking at your campaigns more on weekdays or weekends.
The performance report table below the selectors show the analytics data for indiviual items. It will show up to 10 items at time, and if there are more than 10 items, you will see buttons to navigate through them at the bottom:
Performance Report
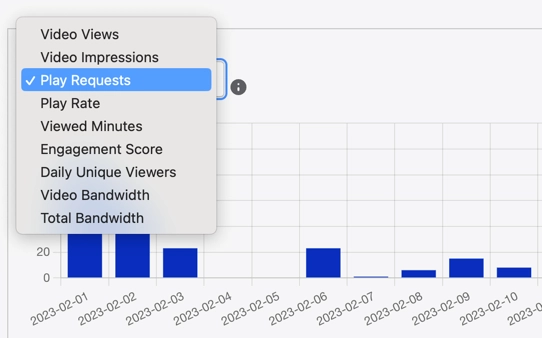
The chart above the performance report table shows the total values for the account for different metrics over the select date range. The selector above the chart allows you to choose different metrics to view:

Engagement reports
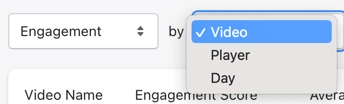
There are also subtypes for the Engagement report type, but they are limited to video, player, and day:
The chart above the engagement report table shows average engagement for videos across the account. The only change you can make in the chart is to adjust the date range.