Introduction
The Brightcove Video Connector for Microsoft Teams (Video Connector) can be installed one of two ways: Manually, as a Teams custom app, or via Microsoft AppSource.
Prerequisites
- Microsoft Teams
- Owner permissions on the Teams location you are installing the Video Connector to
Install from Microsoft AppSource
To install the Video Connector from Microsoft AppSource, follow the steps below.
- Open
https://appsource.microsoft.com/in your browser. -
Search for Brightcove Video Connect:
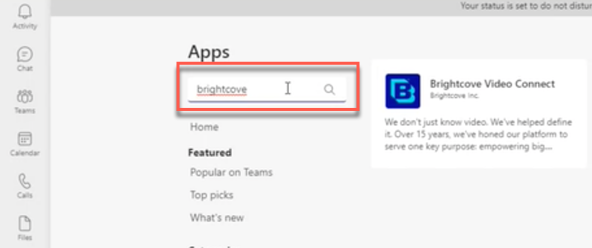
Search for Brightcove -
Click on the app to display the app details:
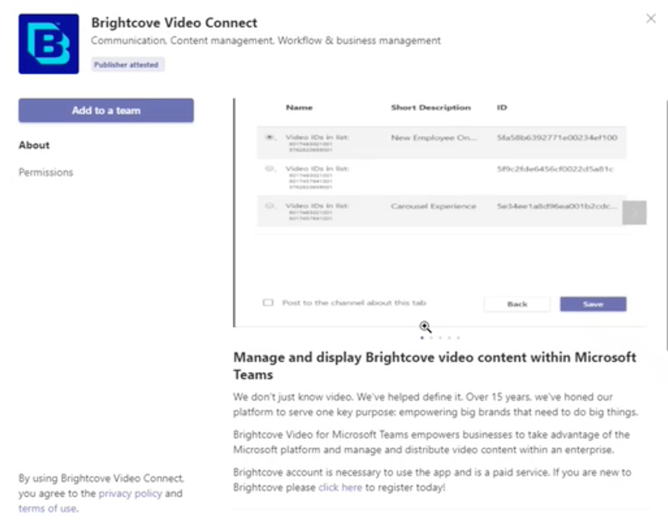
Brightcove App Details -
Click on the Add to a team button:
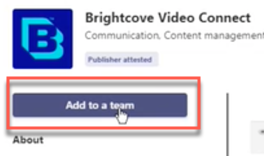
Add to Team Button -
Search for the team you want to add the app to and select it:
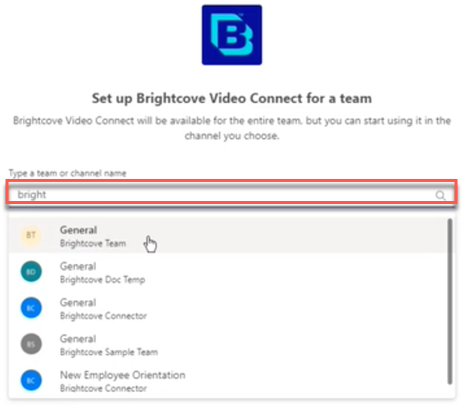
Search for Team -
Note that by default the app is add to the team's General channel - later you will be able to create a new channel and add the app to it also if you wish to:
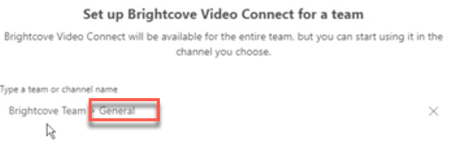
App Installed to General Channel -
Click the Set up a tab button:
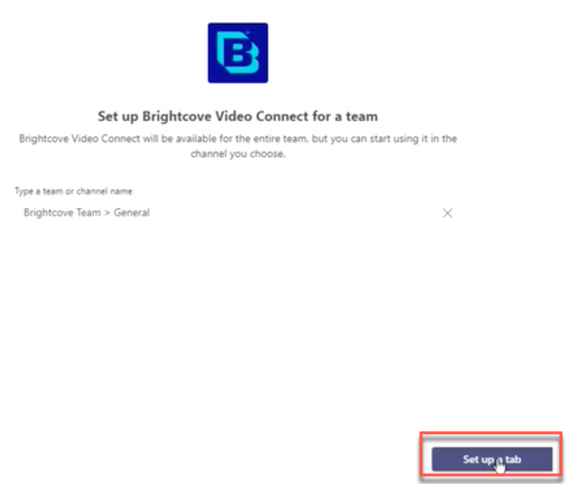
Set Up a Tab -
In the modal dialog that opens, select the Brightcove account you want to connect to the team:
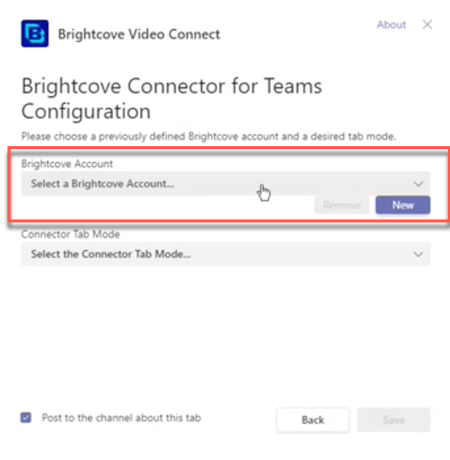
Select Brightcove Account -
Next, select the tab mode you want to use for the connector:
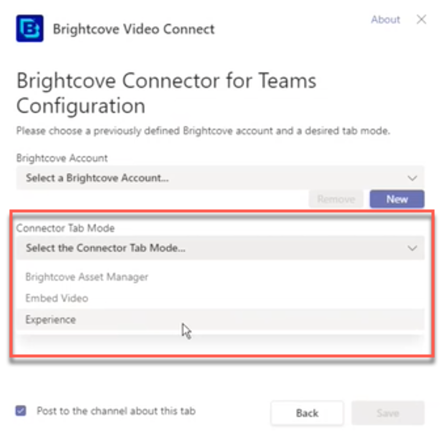
Select Tab Mode" -
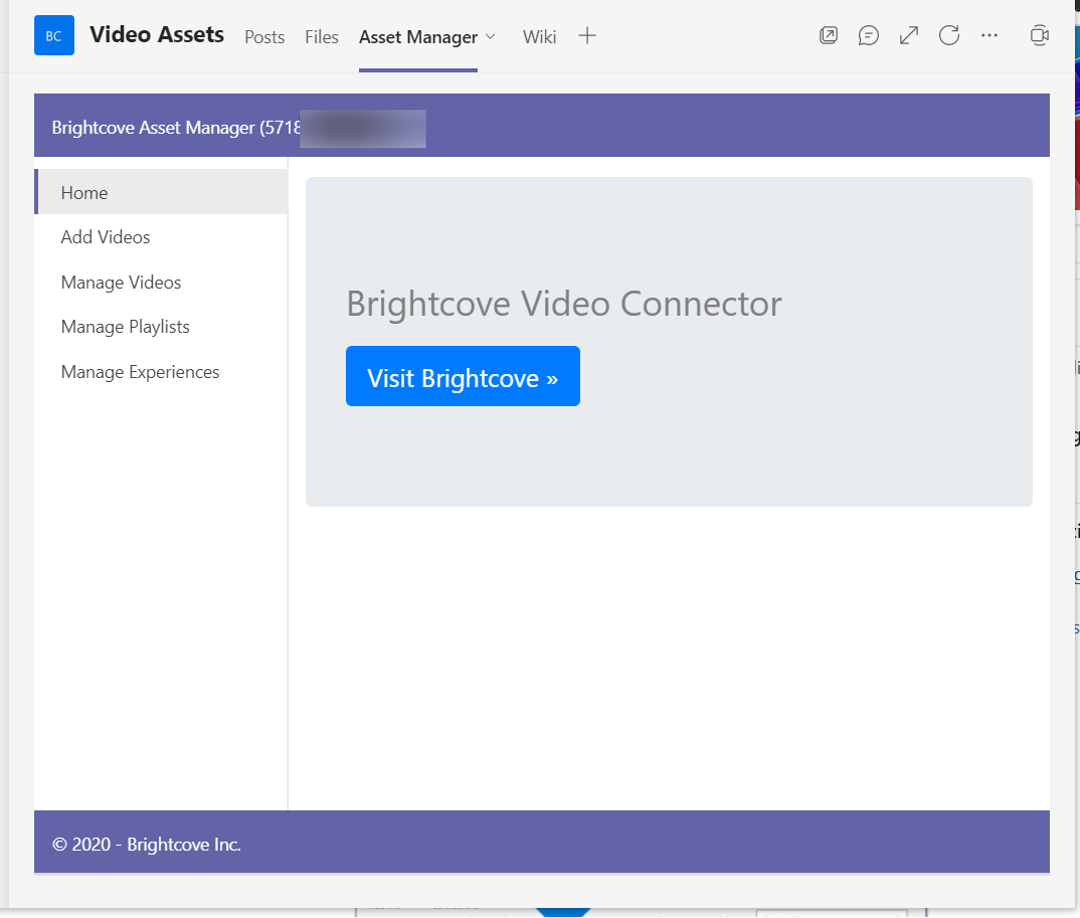
Click Save, and you will be taken to the Asset Manager:
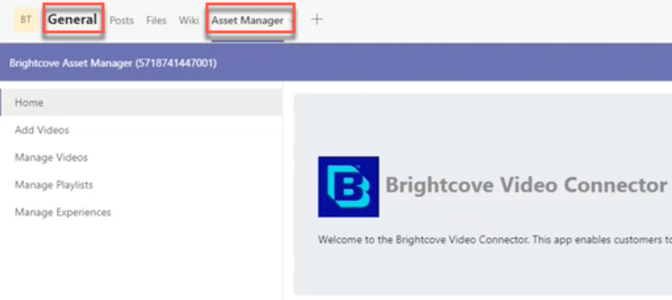
Asset Manager
Manual (Custom App) installation
To install the Video Connector manually (Custom App install in Teams), follow the steps below.
- Download the latest release of the Video Connector manifest package from the GitHub repository here: Microsoft AppSource and save it to your local computer.
- Open Microsoft Teams, and open the Team where you want to install the connector.
-
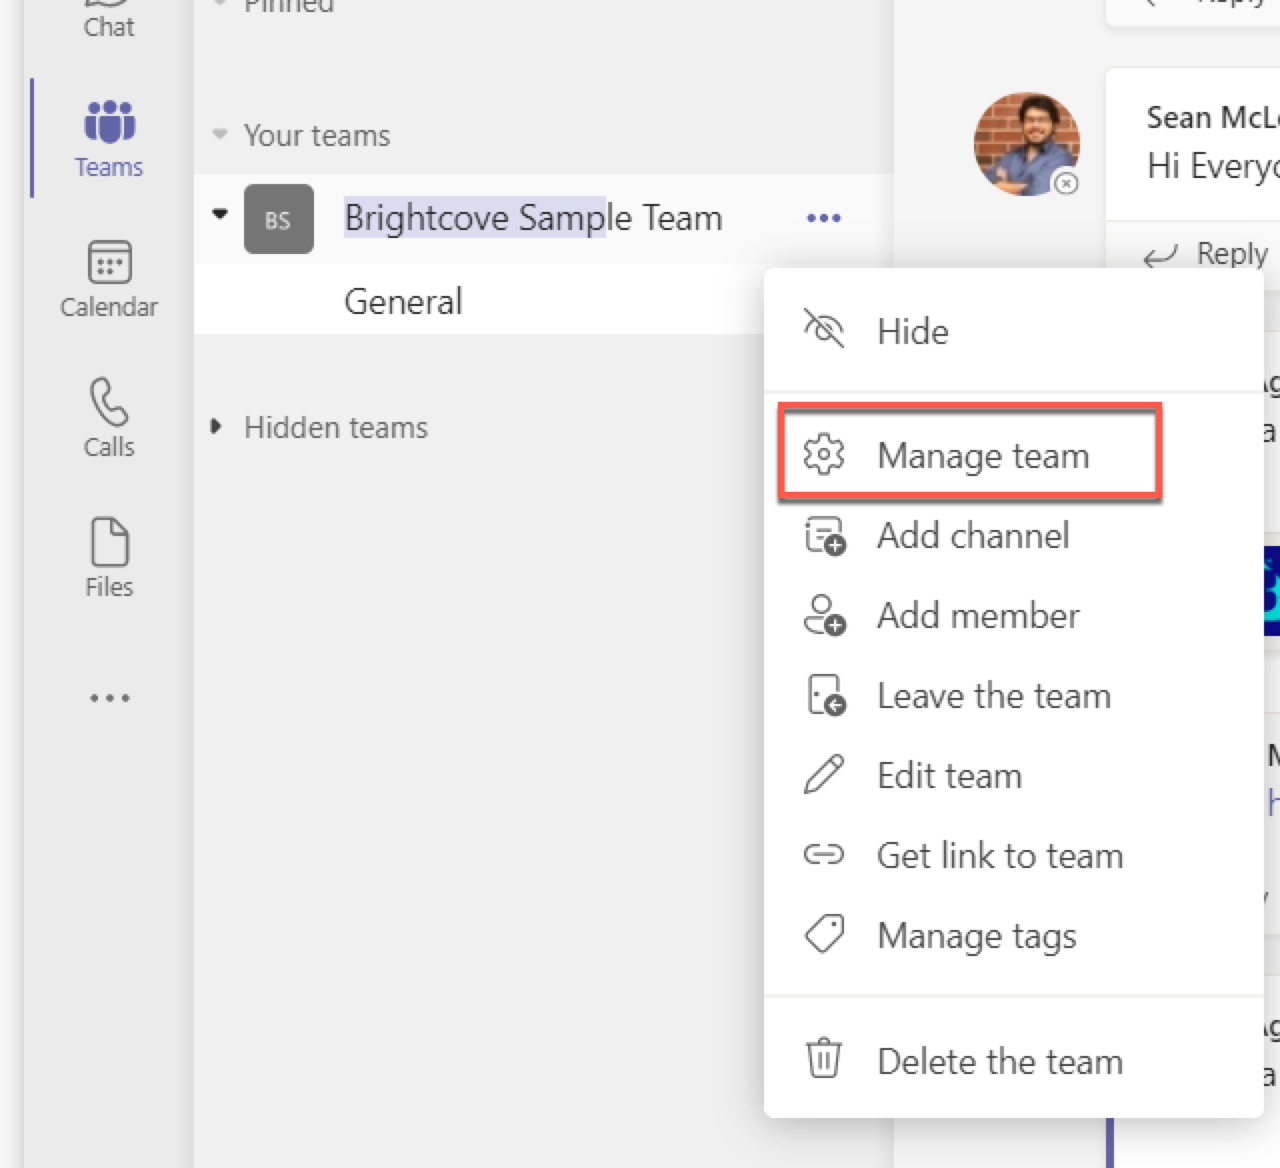
Select the More Options menu:

More Options for Team -
Click the “Manage Team” menu item (note: you must have Owner permissions on this Teams location to see the menu item mentioned – see pre-requisites section above):
Manage Team -
Select the Apps tab:
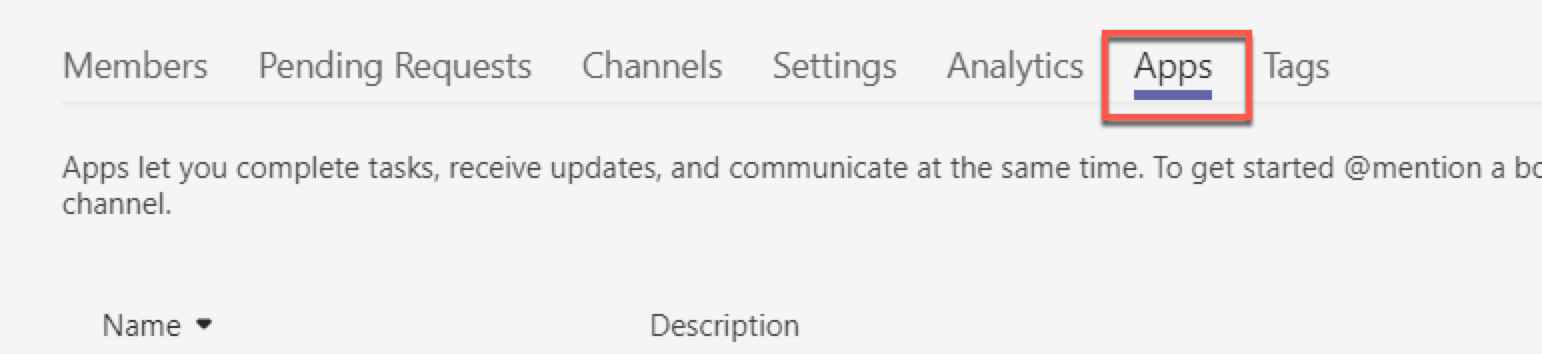
Team Apps Tab -
Click the Upload a custom app link at the bottom of the apps page:
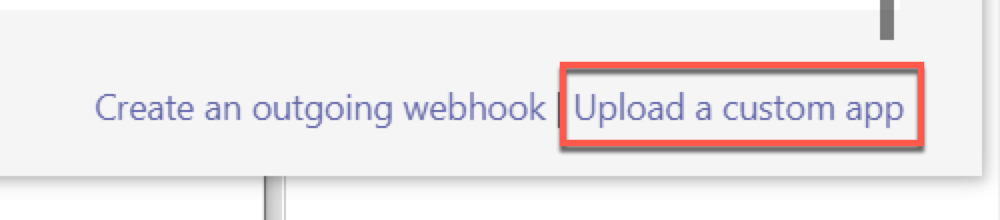
Upload Custom App Link -
Navigate to the location of the Connector manifest (that you previously downloaded), select it, and click the Open button:
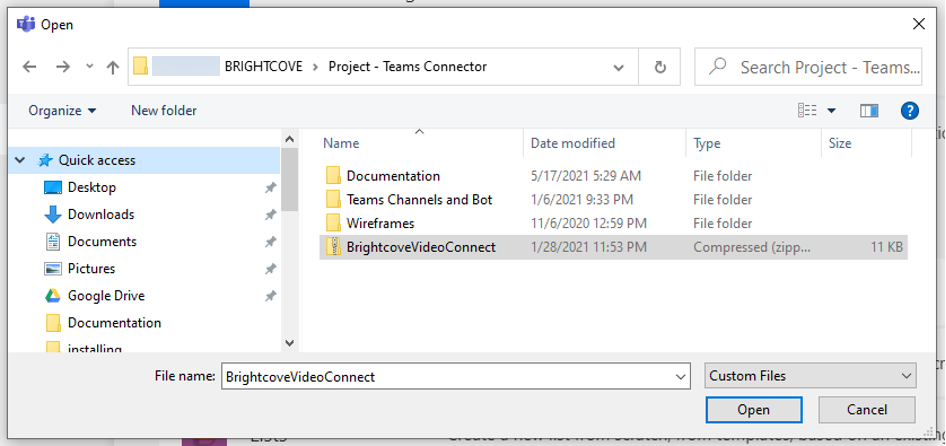
Upload the Connector -
Click Add on the Brightcove Video Connect modal window that is displayed:
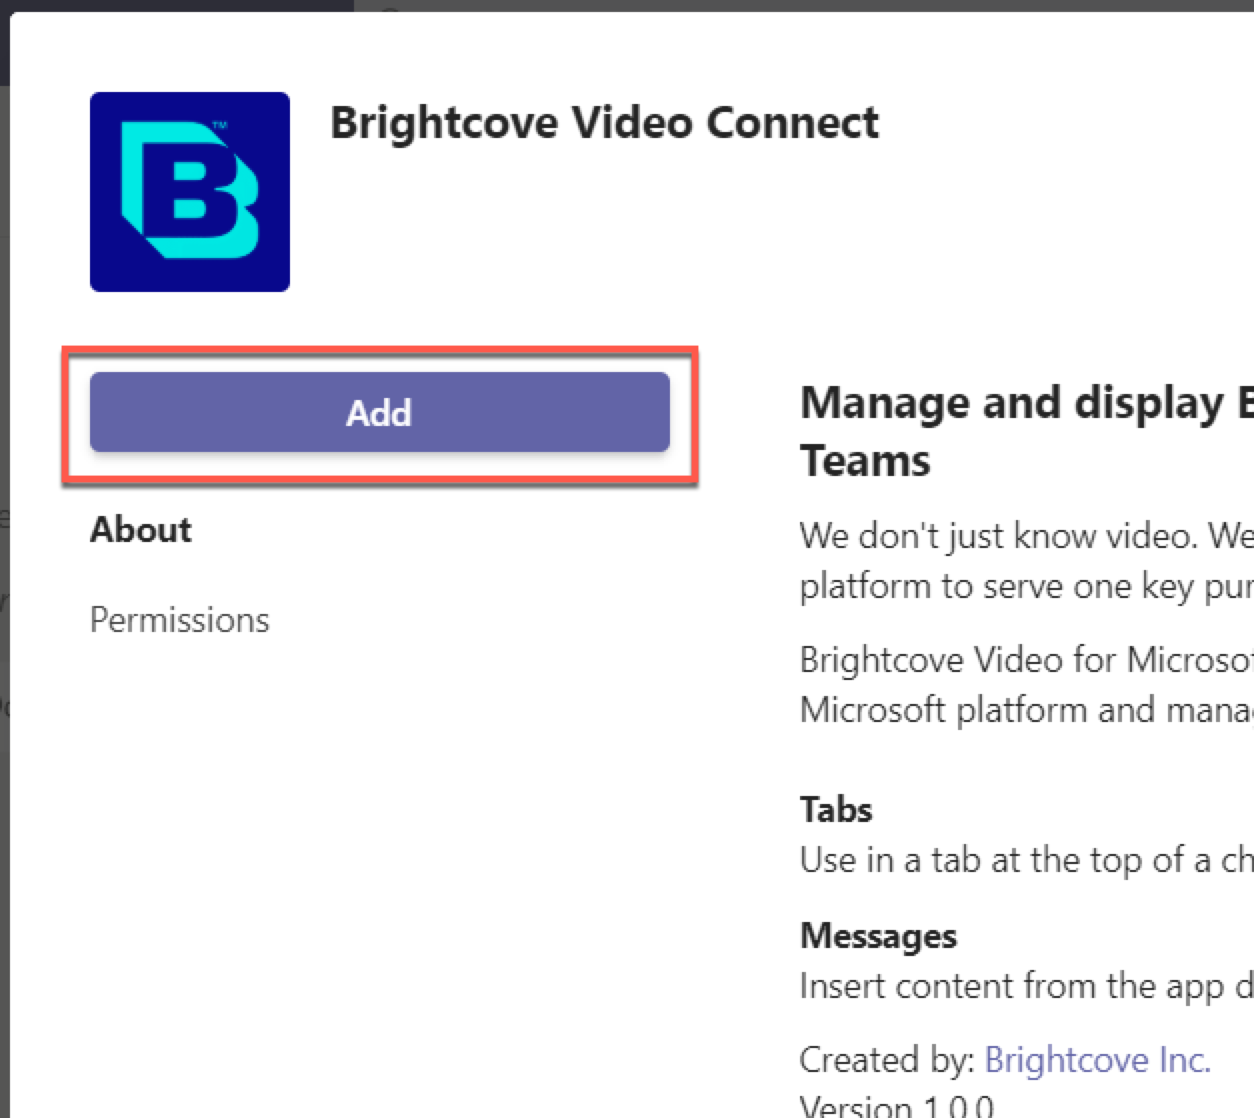
Add Brightcove Video Connect -
The Video Connector app should be installed, and you should now see it in the list of available apps for the Team as shown below:
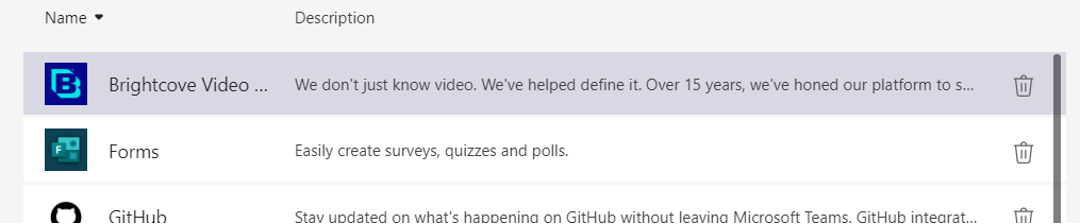
Available Team Apps
We will cover the configuration of the connector in a later section, and using it in Using the Connector for Microsoft Teams
Install from Microsoft App Store
This capability is currently being provisioned and the documentation will be updated once in place.
Add Brightcove Media Asset Manager to Teams
You must first install the Video Connector to the Team you want to add the media manager to. Follow the install guide as outlined in previous sections of the documentation if you have not already done so.
Now we will proceed with the configuration.
- In Microsoft Teams, open the Team that already has the video connector app installed.
- Open the Team Channel you want to install the media manager to.
-
Click the Add Tab menu option:
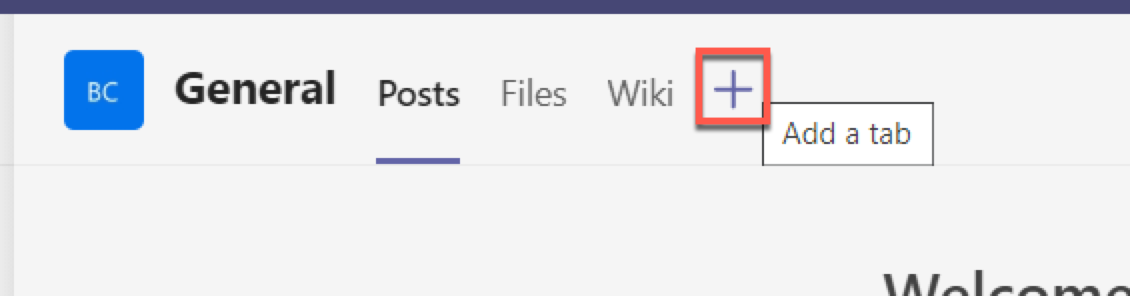
Add Tab Options for Team Channel -
Select the Brightcove Video Connect app from the Add a tab modal window:
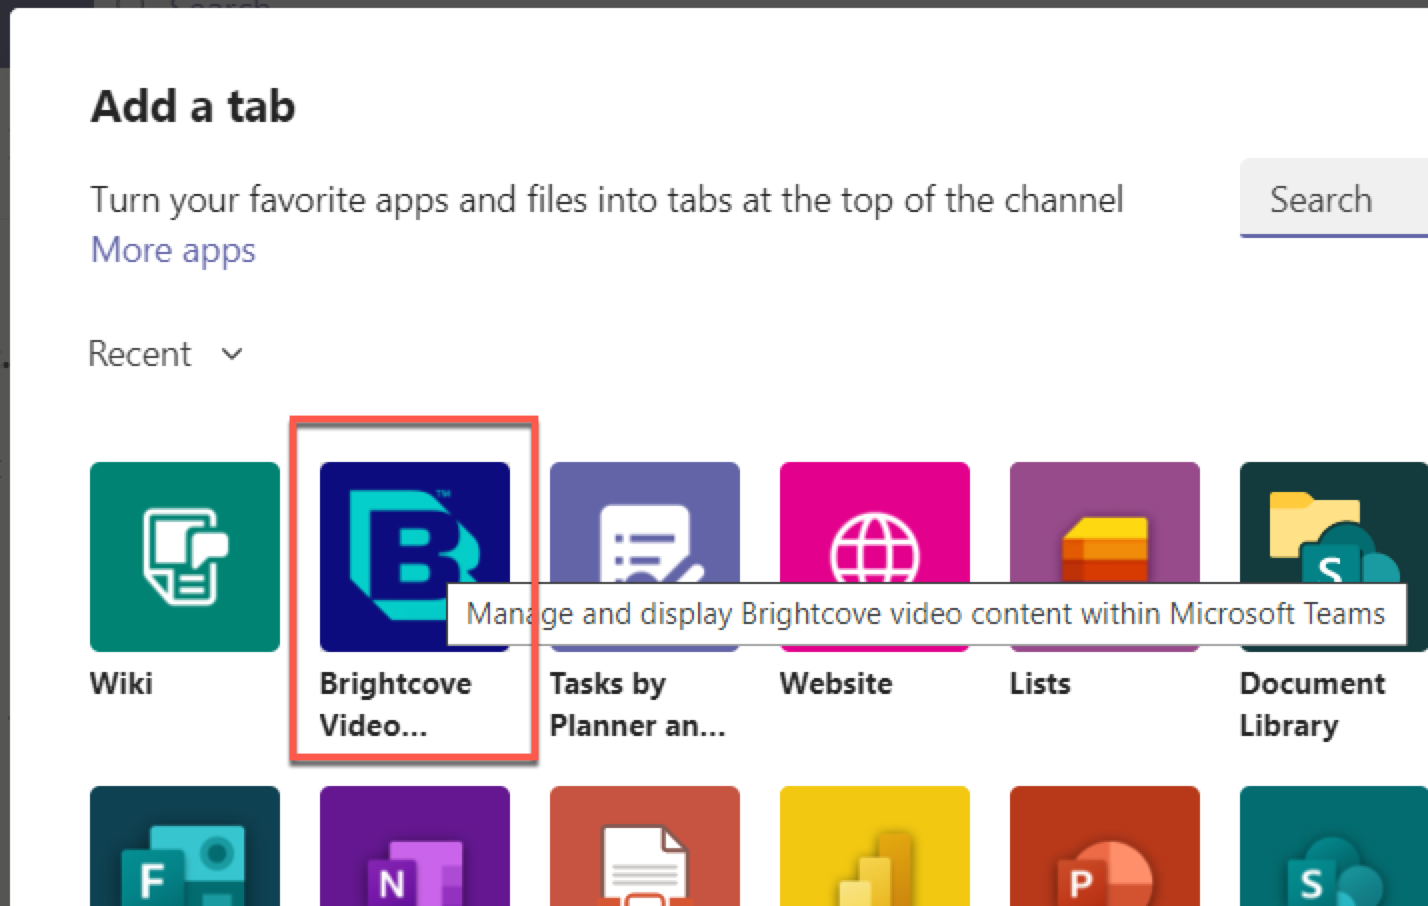
Add a Tab Modal - In the Configuration modal window, under Brightcove Account click New to add an account to the connector (or select one from the drop-down if you have previously used the connector on another Team on this Teams environment before).
-
If adding a new Brightcove Account (if you clicked New in the previous step) fill out the form with your Brightcove Account ID, API Access Key Id (Client ID) and API Secret Access Key (Client Secret) as shown. Click Save Account and Continue.
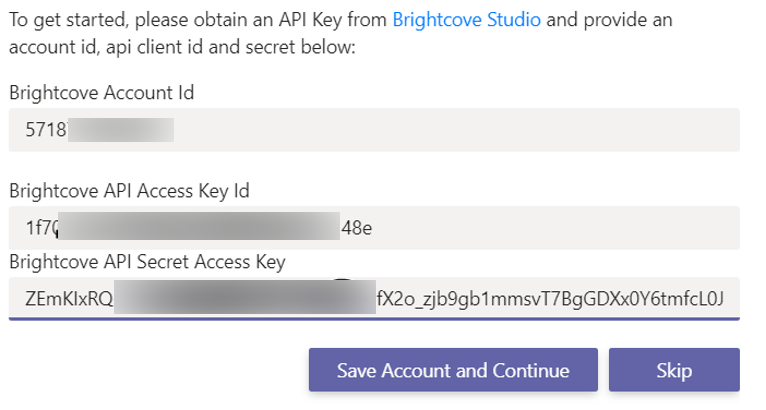
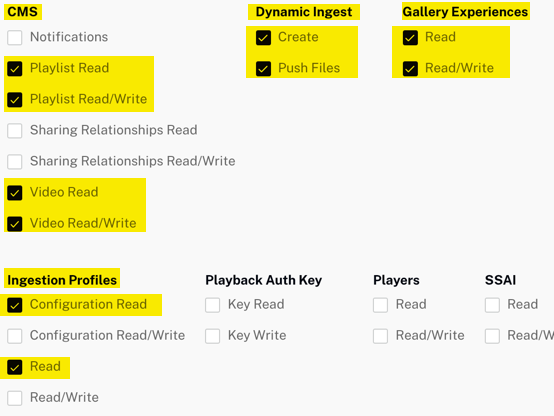
Brightcove Account Information For information on how to get client credentials, see Authentication for API Requests. The credentials need at least these permissions for the CMS, Dynamic Ingest, and Ingest Profiles APIs:
Minimum API Permissions -
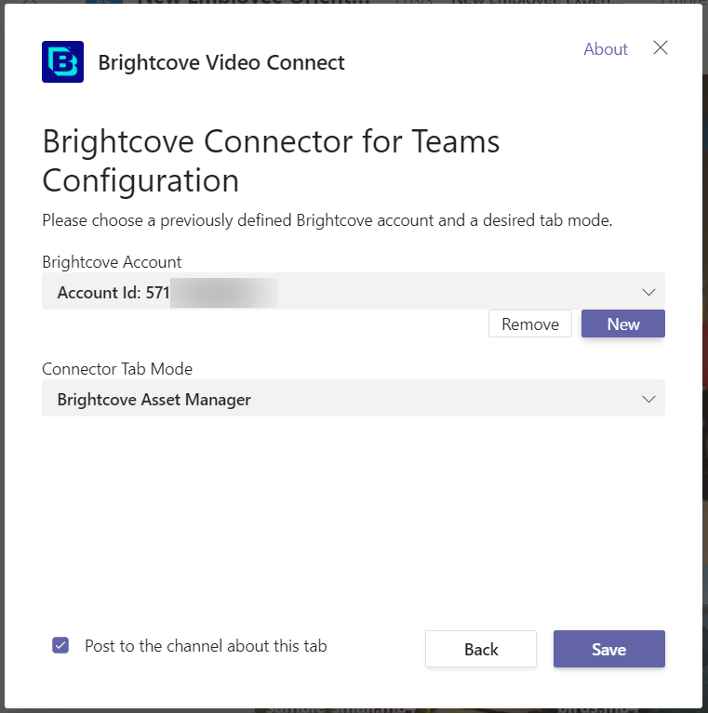
In the configuration window, under Connector Tab Mode select the Brightcove Asset Manager from the dropdown options:

Connector Tab Mode -
Click Save:
Save Brightcove Connector Configuration -
The Brightcove Asset Manager should now appear on your newly created tab as shown below:
Video Connector Configured
The Brightcove Video Connector is now installed and configured. To use the connector to manage media assets, see Using the Connector for Microsoft Teams.